Facebook-f Twitter
GeeksChalk Logo GeeksChalk Logo
Notification
  • Home
  • iPhone
  • iPad
  • Mac
  • Apple Watch
  • Pages
    • About Us
    • Contact Us
    • Advertise With Us
  • 🤩 Trending:
  • 100 new iOS 26 features for iPhone
  • 10 Best iOS 26 Tips & Tricks
  • iPhone 16: Everything We Know
  • iPhone 16 Pro: Everything We Know

GeeksChalk is the leading source for all things iPhone, Mac, iPad, Apple Watch, Vision Pro, and more

GeeksChalkGeeksChalk
  • Home
  • iPhone
  • iPad
  • Mac
  • Apple Watch
Search

Popular Post

iPhone 14 Pro and iPhone 14 Pro Max are shown in gold.
iPhone

How to Fix iPhone not sending text messages to Android

iPhone 15 Pro in black titanium, white titanium, blue titanium, and natural titanium finishes.
iPhone

Apple CarPlay GPS Not Working, Showing Wrong Location: Fix

iPhone outline with an Apple logo
iPhone

Need to restore an iPhone backup? Here’s how

The iPhone’s Messages app, showing iMessages and SMS messages side-by-side. Ā 
Troubleshooting

Is Your iPhone Not Sending Pictures? Here’s How to Fix It

Follow US
Copyright Ā© 2026 www.GeeksChalk.com
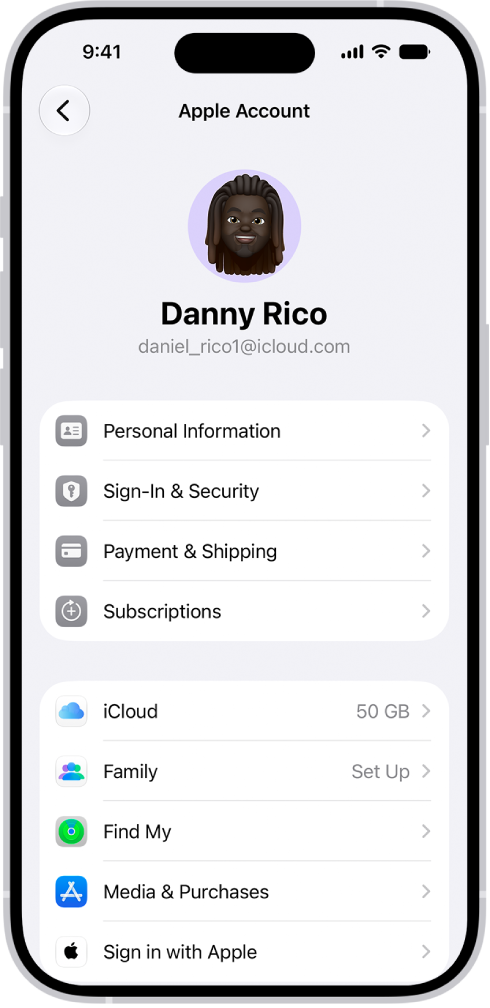
The Apple Account Settings shown with a list of options including personal information, subscriptions, Find My, and more.
GeeksChalk > iPhone > How to use two-factor authentication for your Apple Account on iPhone

How to use two-factor authentication for your Apple Account on iPhone

You can use two-factor authentication for your Apple Account on iPhone, so signing in takes your password and a six-digit code.

Last updated: October 13, 2026 10:44 am
By Abigail Shilets - Staff Writer
Share
2 Min Read

On iPhone, using two-factor authentication helps prevent others from accessing your Apple Account, even if they know your Apple Account password. When it’s on, you need both your Apple Account password and a six-digit verification code to sign in to your Apple Account.

The verification code is sent to the phone number associated with your Apple Account, or it’s displayed on your trusted devices. You can add another trusted device, add or remove a trusted phone number, and create a password for an app that signs in with your Apple Account.

Note: Certain account types might not support two-factor authentication. Two-factor authentication isn’t available in all countries or regions.

Turn on two-factor authentication

  1. Start the Settings app on your iPhone.
  2. Tap your name and tap Sign-In & Security.
  3. Tap Two-Factor Authentication.
  4. Enter a trusted phone number (the number you’ll use to receive verification codes). Then tap Next. A verification code is sent to your trusted phone number.
  5. Enter the verification code on your iPhone.

Two-factor authentication is turned on for your Apple Account, and your iPhone is now a trusted device.

Add another trusted device

Once two-factor authentication is on for your iPhone, you can add other trusted devices to the Apple Account.

  1. On the device you want to add, sign in to the same Apple Account you used to turn on two-factor authentication.
  2. When prompted, enter the six-digit verification code that appears on your iPhone, another trusted device, a trusted phone number, or your Mac.
  3. Enter the verification code on the new device.

You’ll only be asked for a verification code again if you sign out completely, erase your device, need to change your Apple Account password for security reasons, or sign in to your Apple Account page in a web browser.

Add or remove a trusted phone number

Trusted phone numbers come in handy if you want to use two-factor authentication but can’t get to the phone number you added when you turned it on.

  1. Start the Settings app on your iPhone.
  2. Tap your name and tap Sign-In & Security.
  3. Tap Two-Factor Authentication.
  4. Do one of the following:
    • Add a number: Tap Add a Trusted Phone Number and enter the phone number.
    • Remove a number: Tap the Delete button next to the phone number.
  5. When you’re finished making changes, tap Done.

Trusted phone numbers don’t automatically receive verification codes. If you can’t access any trusted devices when setting up a new device for two-factor authentication, tap “Didn’t get a verification code?” on the new device, then choose one of your trusted phone numbers to receive the verification code.

View or remove trusted devices

  1. Start the Settings app on your iPhone.
  2. Tap your name. A list of the devices associated with your Apple Account appears near the bottom of the screen.
  3. To remove a device, tap it, then tap Remove from Account.

Removing a trusted device means it can’t display verification codes anymore, and it’s blocked from iCloud (and other Apple services on the device). You can add it back by signing in to your Apple Account again with two-factor authentication.

Generate a password for an app that signs in to your Apple Account

A third-party app or service (like an email, contacts, or calendar app) needs an app-specific password before you can sign in to your Apple Account from it with two-factor authentication.

  1. Sign in to your Apple Account.
  2. Tap App-Specific Passwords, then tap Generate an app-specific password.
  3. Follow the onscreen instructions.

After you generate your app-specific password, enter or paste it into the password field of the app as you would normally.
TAGGED:Apple Account
ByAbigail Shilets
Staff Writer
Follow:
Abigail is a staff writer for GeeksChalk based in Pennsylvania. She covers news, how-tos, and user guides for iPhone, iPad, Mac, and Apple Watch. Before becoming a writer Abigail studied computer science at University and also worked at Apple for more than two years. When not creating masterpiece for GeeksChalk, you can usually find Abigail hiking, climbing, or otherwise unplugged.
Leave a Comment Leave a Comment

Leave a Reply Cancel reply

Your email address will not be published. Required fields are marked *

Recent News Flash

A request from an app to use location data on iPad. Options are Allow Once, Allow While Using App, and Don't Allow.

How to control the location information you share on iPad

The Health Details screen, which includes fields for name, birth date, blood type, and other information.

How to fill out your Health Details in Health on iPhone

The Next Wake Up Only screen in Health with Alarm turned off at the bottom.

How to turn off alarms and delete sleep schedules in Health on iPhone

The Family Sharing screen in Settings. Five family members are listed with recommendations for the family.

How to add a member to a Family Sharing group on iPhone

Trending Now

The Siri app on an iPhone, iPad, and Mac.

How to use the Siri app with Siri AI on iPhone

The Files app showing the files and folders in your iCloud Drive. The More menu has options for Selecting items, creating a new folder, Scan Documents, and Connect to Server. Below that are options to view items on the screen as Icons or a List. At the bottom are sort options for Name, Kind, Date, Size, and Tags followed by View Options.

How to share files and folders in iCloud Drive on iPhone

An iPhone showing a number next to each item in the Reminders app.

How to use Voice Control to interact with iPhone

Explore More

Recommended For You

A custom route in the Maps app, with distance, elevation profile, estimated time, and options to save or get directions to the start of the route.

How to save walks or hikes in Maps on iPhone

The Voice Memos list screen with a selected recording at the top. The recording timeline has a playhead, which you can drag to go to a specific place in the recording. The play controls are below the timeline.

How to search for or rename a recording in Voice Memos on iPhone

Stickers appear below a conversation. Each button across the top of the card opens a sticker pack.

How to send stickers in Messages on iPhone

The front of a burgundy iPhone 18 Pro is displayed next to a rear-facing burgundy iPhone 18 Pro Max.

How to connect with friends in the Apple Games app on iPhone

GeeksChalk Logo GeeksChalk Logo
  • Home
  • Contact Us
  • Advertise
  • Our Staff
  • Editorial Guidelines
  • Terms
  • Privacy
  • Accessibility
  • Copyright
  • About Us
  • Fact Checking Policy
  • Correction Policy
  • Ethics Policy
  • Ownership Policy
Copyright Ā© 2026 www.GeeksChalk.com
Welcome Back!

Sign in to your account

Username or Email Address
Password

Lost your password?