Facebook-f Twitter
GeeksChalk Logo GeeksChalk Logo
Notification
  • Home
  • iPhone
  • iPad
  • Mac
  • Apple Watch
  • Pages
    • About Us
    • Contact Us
    • Advertise With Us
  • 🤩 Trending:
  • 100 new iOS 26 features for iPhone
  • 10 Best iOS 26 Tips & Tricks
  • iPhone 16: Everything We Know
  • iPhone 16 Pro: Everything We Know

GeeksChalk is the leading source for all things iPhone, Mac, iPad, Apple Watch, Vision Pro, and more

GeeksChalkGeeksChalk
  • Home
  • iPhone
  • iPad
  • Mac
  • Apple Watch
Search

Popular Post

iPhone 15 Pro in black titanium, white titanium, blue titanium, and natural titanium finishes.
iPhone

Apple CarPlay GPS Not Working, Showing Wrong Location: Fix

iPhone 14 Pro and iPhone 14 Pro Max are shown in gold.
iPhone

How to Fix iPhone not sending text messages to Android

Connect an iPhone to car Bluetooth
Troubleshooting

How to fix Bluetooth not working on iPhone after iOS 26 update

iPhone outline with an Apple logo
iPhone

Need to restore an iPhone backup? Here’s how

Follow US
Copyright © 2026 www.GeeksChalk.com
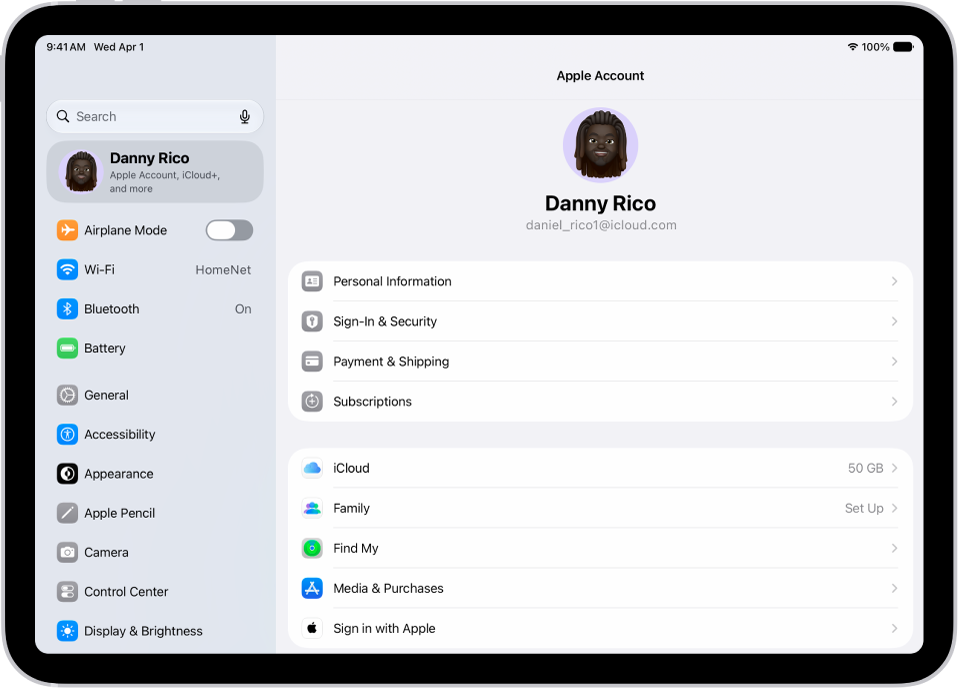
The Apple Account Settings shown with a list of options including—personal information, subscriptions, Find My, and more.
GeeksChalk > iPad > How to sign in with Apple on iPad

How to sign in with Apple on iPad

You can use Sign in with Apple on iPad to sign in to websites and apps with your Apple Account, and set up or upgrade accounts.

Last updated: October 18, 2026 9:58 am
By Abigail Shilets - Staff Writer
Share
3 Min Read

On iPad, with Sign in with Apple, you can sign in to participating websites and apps with your Apple Account. You don’t need to create and remember new passwords, your account is protected with two-factor authentication, and you can share your access with family and trusted contacts.

It’s designed to respect your privacy. Websites and apps can ask only for your name and email address to set up your account, and Apple won’t track you as you use them. Some websites and apps don’t even request your name and email address, so you just authenticate with Face ID or Touch ID and start using the app.

Sign in with Apple requires two-factor authentication for your Apple Account. This protects your Apple Account, your app accounts, and your app content.

Set up or upgrade an account to Sign in with Apple

When a participating website or app asks you to set up or upgrade an account, do the following:

  1. Tap Sign in with Apple.
  2. Follow the onscreen instructions.

When a website or app doesn’t request your name and email address, you simply authenticate with Face ID or Touch ID, depending on your model, and start using the app.

Other apps may want your name and email address for setting up a personalized account. When an app asks, Sign in with Apple shows your name and the personal email address from your Apple Account so you can review them.

To edit your name, tap it, then use the keyboard to make changes.

Do one of the following to specify an email address:

  • Use your personal email address: Tap Share My Email.

    If you have multiple email addresses associated with your Apple Account, choose the address you want.

  • Hide your email address: Tap Hide My Email.

    This option allows you to receive email from the app without sharing your personal email address. When you choose this option, Apple creates a unique, random email address for you, and any email sent from the app to this address is forwarded to your personal address.

After you review your information and choose an email option, tap Continue, authenticate with Face ID or Touch ID (depending on your model), then start using the app.

Sign in to access your account

After you set up an account with a website or app using Sign in with Apple, you typically don’t need to sign in to it again on your iPad. But if you’re asked to sign in (for example, after you sign out of an account), do the following:

  1. Tap Sign in with Apple.
  2. Review the Apple Account that appears, then tap Continue.
  3. Authenticate with Face ID or Touch ID (depending on your model).

Change the address used to forward email

With more than one address associated with your Apple Account, you can pick which one receives your forwarded email, provided you chose to hide your email address when you created the account.

  1. Open the Settings app on your iPad.
  2. Tap your name, tap Sign-In & Security, and tap Forward To.
  3. Choose a different email address and then tap the Save button.

Review or change Sign in with Apple settings for apps

  1. Open the Settings app on your iPad.
  2. Tap your name and tap Sign in with Apple.
  3. To change a setting for an app, tap it and then do any of the following:
    • Turn off forwarding email: Tap Manage Hide My Email, tap the app, and turn off Forward To. You won’t receive any further emails from the app.
    • Stop using Sign in with Apple: Tap Delete, then tap Stop Using. You may be asked to create a new account the next time you try to sign in to the app.

Share your Sign in with Apple access

  1. Go to the Passwords app on your iPad.
  2. Tap All, then locate and tap the account where you use Sign in with Apple.
  3. Tap Group and then tap New Group.
  4. Enter a name for the group, then tap Add People.
  5. Type the name, email address, or phone number of the person or people you want to add and tap Add.

    Note: To add someone to your group, they must be in your Contacts app and have a device using iOS 17, iPadOS 17, macOS 14, or later. If they can be added to the group, their contact information appears in blue. If it appears in gray, their iPhone, iPad, or Mac might not support shared password groups.

  6. Tap the Create button.

Your other devices signed in to the same Apple Account, including iPhone, Mac, Apple Watch, iPod touch, and Apple TV 4K, can use Sign in with Apple too.

To sign in from an Android app, a Windows app, or any web browser, tap Sign in with Apple, then enter your Apple Account password.
TAGGED:Apple Account
ByAbigail Shilets
Staff Writer
Follow:
Abigail is a staff writer for GeeksChalk based in Pennsylvania. She covers news, how-tos, and user guides for iPhone, iPad, Mac, and Apple Watch. Before becoming a writer Abigail studied computer science at University and also worked at Apple for more than two years. When not creating masterpiece for GeeksChalk, you can usually find Abigail hiking, climbing, or otherwise unplugged.
Leave a Comment Leave a Comment

Leave a Reply Cancel reply

Your email address will not be published. Required fields are marked *

Recent News Flash

The Calendars list, with checkmarks indicating which calendars are active. The Done button for closing the list is in the top-right corner. The Add Calendar button is in the bottom-left corner.

How to use the Holidays calendar on iPad

The Calendars list, with checkmarks indicating which calendars are active. The Done button for closing the list is in the top-right corner. The Add Calendar button is in the bottom-left corner.

How to share iCloud calendars on iPad

The iPad Control Center. Controls for Airplane Mode, cellular data, Wi-Fi, and Bluetooth are in the top-left group in Control Center for Wi-Fi + Cellular iPad models. The Camera control is at the bottom right of Control Center. The screen on the right shows the quick menu of options that appear when you touch and hold the Camera control.

What iPad status icons mean

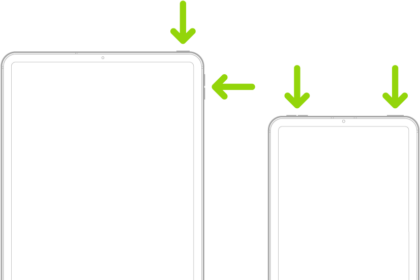
Two iPad models, each with a top button. One model has volume buttons on the side; the other has volume buttons at the top.

How to get information about your iPad

Trending Now

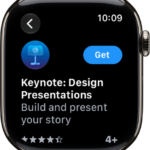
An App Store screen showing the product page of an app with a short description of the app, its ratings, and the Get button on the right.

How to get apps in the App Store on Apple Watch

A screen in the Cycle Tracking app showing a logged period with logged symptoms at the bottom of the screen.

How to track menopause stages with Apple Watch

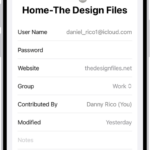
The Passwords app showing details for an account, including User Name, Password, and Website.

How to see the websites you’ve excluded from automatically filling in passwords on iPad

Explore More

Recommended For You

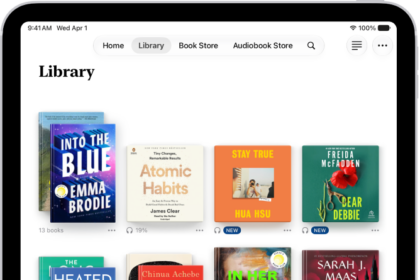
The Library screen in the Books app.

How to organize books in the Books app on iPad

The Home screen in the Books app, showing the Current, Recent, and Want to Read sections.

How to access books on other Apple devices in Books on iPad

The Reading Goals screen showing stats for the user—such as today's reading, their reading record for the week, and their books read this year.

How to set reading goals in the Books app on iPad

A page of a book in the Books app, with a portion of the page's text selected. The Highlight, Add Note, Translate, Search, Copy, and Share buttons are above the selected text.

How to annotate books in the Books app on iPad

GeeksChalk Logo GeeksChalk Logo
  • Home
  • Contact Us
  • Advertise
  • Our Staff
  • Editorial Guidelines
  • Terms
  • Privacy
  • Accessibility
  • Copyright
  • About Us
  • Fact Checking Policy
  • Correction Policy
  • Ethics Policy
  • Ownership Policy
Copyright © 2026 www.GeeksChalk.com
Welcome Back!

Sign in to your account

Username or Email Address
Password

Lost your password?