When you watch or play a supported show, movie, song, or game, or make a FaceTime call, your AirPods can use Spatial Audio and head tracking to create an immersive theater-like environment. Supported models include AirPods 3, AirPods 4, AirPods 5, AirPods Pro, and AirPods Max.
With Personalized Spatial Audio, your iPhone creates a representation of your ear and head shape to better match how you hear sound. Spatial Audio and head tracking can be controlled app by app, and the setting you choose sticks, so it’s applied automatically the next time you use that app.
Learn how Spatial Audio works
When you connect supported AirPods to iPhone or iPad, you can learn more about Spatial Audio.
- Wear your AirPods, and make sure they’re connected to your device.
- Open the Settings app on your iPhone or iPad.
- Tap the name of your AirPods near the top of the screen.
- Below Spatial Audio, tap See & Hear How It Works (if you don’t see that option, first tap Audio & Routing).
Use Personalized Spatial Audio
For Personalized Spatial Audio, an iPhone X or later can create a representation of your ear and head shape. The resulting Spatial Audio profile customizes audio so it better matches how you hear sound. It also syncs across your Apple devices where you’re signed in to the same Apple Account, if they have iOS 16, iPadOS 16.1, macOS 13, tvOS 16, or later.
Do one of the following:
- Open the case lid with your AirPods inside, hold the case close to your iPhone, then follow the onscreen instructions.
- Wear your AirPods, and make sure they’re connected to your device. On your iPhone, go to the Settings app, then tap the name of your AirPods near the top of the screen. Tap Personalized Spatial Audio (if you don’t see that option, first tap Audio & Routing), then tap Personalize Spatial Audio.
Stop using Personalized Spatial Audio
- Wear your AirPods, and make sure they’re connected to your device.
- Do one of the following:
- iPhone or iPad: Go to the Settings app. Tap the name of your AirPods near the top of the screen. Tap Personalized Spatial Audio (if you don’t see that option, first tap Audio & Routing). Tap Stop Using Personalized Spatial Audio.
- Mac: Go to the System Settings app, click the name of your AirPods in the sidebar (you may need to scroll down), and click Turn Off under Personalized Spatial Audio (if you don’t see that option, first click Audio & Routing).
To use Personalized Spatial Audio again, you can set it up on your iPhone.
Control Spatial Audio and head tracking on iPhone or iPad
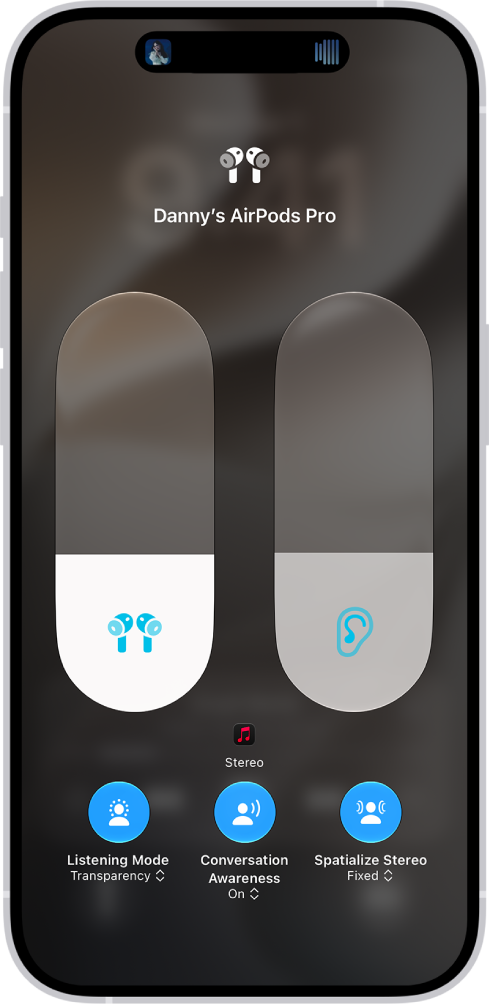
You can control Spatial Audio and head tracking in Control Center for each supported app.
Spatial Audio and head tracking also work with AirPods Max 1 (USB-C) or AirPods Max 2 when you connect to your device with a USB-C cable, as long as your device has iOS 18.4, iPadOS 18.4, or later. For details, see our article, Connect AirPods Max with an audio cable.
- Wear your AirPods, and make sure they’re connected to your device.
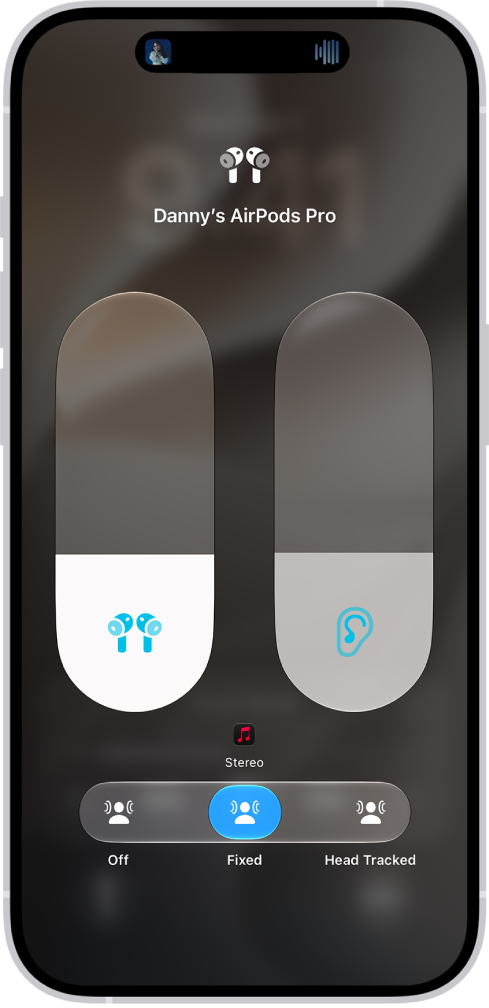
- Open Control Center and touch and hold the volume control. Tap Spatial Audio at the lower right.
- Tap one of the following:
- Off: Turns off both Spatial Audio and head tracking.
- Fixed: Turns on Spatial Audio without head tracking.
- Head Tracked: Turns on both Spatial Audio and head tracking. The audio you’re listening to will sound like it’s coming from your iPhone or Mac.
The settings you choose are saved and applied automatically the next time you use that app. For example, if you tap Fixed while listening to a song in the Music app, the Fixed setting is automatically used the next time you play a song in that app.
Control Spatial Audio and head tracking on Mac
If you have a Mac computer with Apple silicon and macOS 12.3 or later, Spatial Audio and head tracking make supported shows, movies, and music sound as if they’re coming from all around you. And for each supported app, you can turn Spatial Audio and head tracking on or off.
With AirPods Max 1 (USB-C) or AirPods Max 2, you can use Spatial Audio and head tracking over a USB-C cable connected to your Mac, too, but your Mac needs macOS 15.4 or later. Read our guide, Connect AirPods Max with an audio cable, to set up the cable connection.
Note: Spatial Audio isn’t available for all apps or content.
- Wear your AirPods, and make sure they’re connected to your Mac.
- Click the AirPods icon in the menu bar.
If the AirPods icon isn’t in the menu bar, go to the System Settings app, then click Menu Bar in the sidebar. Below Menu Bar Controls, select Sound. (You may need to scroll down.)
- Choose one of the following below Spatial Audio:
- Off: Turns off both Spatial Audio and head tracking.
- Fixed: Turns on Spatial Audio without head tracking.
- Head Tracked: Turns on both Spatial Audio and head tracking. This allows the sound to follow the movement of your head.
Control Spatial Audio and head tracking on Apple TV 4K
You can customize the Spatial Audio settings for each supported app using Control Center on Apple TV 4K. You can also turn head tracking on or off for all apps. (tvOS 15.1 or later required.)
Note: Spatial Audio isn’t available for all apps or content.
- Wear your AirPods, and make sure they’re connected to your Apple TV 4K.
- While watching a movie or TV show or listening to music, open Control Center. Go to the AirPods icon at the top of the screen (next to the time display).

- Go to Spatial Audio and select an option.
The settings you choose are saved and applied automatically the next time you use that app. For example, if you turn on Spatial Audio while using the Apple TV app with your AirPods, Spatial Audio automatically turns on the next time you use the app with your AirPods.
Note: You can disable dynamic head tracking on Apple TV 4K for every app. Go to the Settings app, select Accessibility, select AirPods, and select your AirPods. Then turn off Center Audio on TV.
This guide is for iOS 27, iPadOS 27, macOS 27, tvOS 27, watchOS 27, or later.
See also