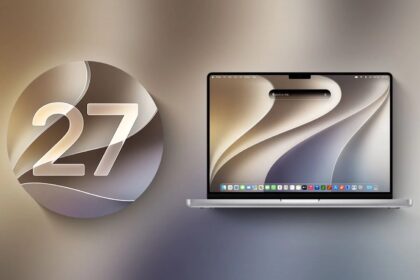
Setup Assistant includes a built-in version of the Migration Assistant app (found in /Applications/Utilities), which can copy important files from another computer or another volume onto a fresh macOS 27 Golden Gate install. We use it here to transfer the data from your backup.
To transfer your old data to your new installation, begin by selecting “From a Mac, Time Machine backup or Startup disk,” then click Continue. Then work your way through the following screens.
Transfer information to this Mac
Select your backup source—either an external drive containing a bootable or data-only duplicate, or a Time Machine volume—and click Continue. For Time Machine backups, another screen appears listing each available backup; select the one you want to use (almost certainly the most recent one) and click Continue again.
If your source disk is a startup volume protected with FileVault, you’ll be prompted to enter the disk’s password.
Select the information to transfer
Now, select the kinds of data you want to transfer. The screen shows the size of each item. As you make your selections, the total size of the selected items, along with available space on your macOS 27 volume, updates automatically. (It may take a few minutes for the installer to initially display and calculate the size of each option.)
If the volume you’re transferring from has only one user account, you may see only three checkboxes, all selected by default: Applications, Documents & Data (with an accompanying Edit button), and System & Network. If the volume has more than one user account, you’ll see a scrolling list that contains numerous items—again, all selected by default: Applications, each user account listed by name, an Other Files & Folders entry, and System & Network.
Here’s an explanation of each option, and my recommendations:
- Applications: This option transfers the contents of your previous
/Applicationsfolder (and its subfolders, such as Utilities), skipping any applications already installed as part of macOS 27. Because you may find it tedious to reinstall your applications, leave this option selected, as it is by default.
If you select Applications, the macOS 27 installer also copies the contents of /Library on your previous system. This is extremely good, because that folder contains many support files without which some apps can’t run.
-
Documents & Data: If you have just one user account, you’ll see an option labeled Documents & Data—this refers to the data in your user account. Click Edit to view its contents. In the dialog that appears, you can deselect any top-level folder within the account, except for the Library folder. Along with the visible top-level folders is a folder called Other Data. Apple doesn’t specify what this includes, so I suggest leaving it selected just in case it contains anything you need. Finally, there’s an option labeled “Other files and folders.” This refers to any files or folders at the root level of your old volume as well as anything in the
/Users/Sharedfolder. I suggest leaving this enabled. - User accounts: If you have more than one user account, each is shown at the top level of the list.
This list may include “users” that don’t have a conventional user account or home folder on your Mac, but which your Mac considers to have an account of a sort—people with whom you’ve shared files using System Settings > General > Sharing, for example, or special low-level accounts added by software such as MacPorts or a VPN service. It’s best to leave such user accounts selected, even if they have no home folder or appear to contain no data.
Transferring a user means copying the user’s entire home folder (/Users/SomeUserName), if any, to the macOS 27 volume; once a user is transferred, the user can log in without having to set up an account again. You should transfer all the existing users unless you have accounts that are no longer in use. You can, if you like, deselect any individual (top-level) folders within a user’s home folder to skip copying those to your macOS 27 volume. As for the unexplained Other Data folder (mentioned in the previous bullet point), the safest course is to leave it selected.
If you don’t transfer at least one account, your screens later in these steps will be slightly different. Also, if you ever want to transfer any of these accounts, now is by far the best time to do so; copying files manually may cause you no end of grief and even the standalone Migration Assistant may introduce unwanted complications.
-
Other Files & Folders: As in the single-user account setting described in the second bullet point, this option refers to any files or folders at the root level of your old volume as well as anything in the
/Users/Sharedfolder. I suggest leaving this enabled. - System & Network: This category sometimes has up to three sub-items that you can select: System Settings includes certain system-wide settings, such as sharing settings, energy saver settings, and parental controls. Printers refers to your printer settings. Network includes the settings on your Network setting pane. I suggest leaving System & Network (and all sub-items, if present) checked.
After making your selections, click Continue.
Your Mac may display a screen asking you to set passwords for each user account that you’re migrating to your new macOS 27 volume. You must set a password for at least one administrator account you want to migrate; administrator accounts for which you don’t set a password can’t be copied to your macOS 27 volume. So, click Set Password next to an account name, enter and repeat a password for that user (which can be the same as the password that user currently uses), and click Set Password. Repeat for each administrator account you want to migrate.
If you’re asked to set up passwords and your backup contains accounts for any non-administrators, the installer screen automatically assigns them a new, temporary password. Be sure to write this password down (or take a photo, or both), as it won’t be shown again. Alternatively, you can click Promote to Admin and follow the prompts to promote any or all of these users to administrators. (You can always demote them to standard users later by going to System Settings > Users & Groups.)
Transferring your information
Migration Assistant copies the selected items to your new macOS 27 volume, a process that may take just a few minutes or several hours, depending on how much data you are transferring. (And you should completely disregard any time estimates you see—as elsewhere in the installer, they’re wildly inaccurate.) Your Mac may restart during the transfer process.
Migration completed
At the end of the migration process, and after one last restart, a Migration Completed screen appears, stating that your data has been migrated and is ready to use. Click Done to dismiss the window. At this point, your Mac should prompt you to log in, and then just a few questions remain.
The nuke-and-pave option
Some people want to do a truly clean clean install of macOS 27 Golden Gate—that is, install a pristine copy of macOS completely from scratch, with no migration of older apps and files. The technical term for such people is gluttons for punishment, because (having done this a few times myself) I can guarantee that it will involve many frustrating hours of tedious work. It’s virtually never necessary, and my professional opinion is that life is too short—you should avoid doing this.
Nevertheless, if you insist on this approach, let me offer a few tips:
- Follow everything in Plan B except the transfer part—on the Migration Assistant screen, click “Not Now.”
- Besides the usual Setup Assistant screens, you may be asked to set up other items, such as iCloud Keychain, and to select your time zone.
- Once macOS 27 is running, you’ll have to reinstall all your apps. It’s pretty easy to do that for apps from the App Store. For everything else, you’re on your own—and I hope you kept track of your license codes, because you’ll have to reenter them all!
- You’ll have to reset most of your settings from scratch. But…
- If you use iCloud, the settings and data for apps such as Mail, Contacts, and Calendar will restore themselves, as will your keychain contents (assuming you have the relevant switches enabled in System Settings > Your Name > iCloud).
- If you use Dropbox or similar cloud storage, you can log in and have all the files stored there sync back to your Mac—but be prepared for a long wait.
- You may want to copy at least some files—such as your Photos or Music libraries—from a backup if you don’t already sync them via iCloud. Guard that backup carefully until you’re certain that you have everything you need from it.