AirPods Pro 2 and AirPods Pro 3 support a clinical-grade Hearing Aid feature for perceived mild to moderate hearing loss. You can take a Hearing Test with your AirPods Pro 2 or AirPods Pro 3 using your iPhone or iPad, or use an existing hearing test result, such as an audiogram from your hearing healthcare professional. Your AirPods Pro 2 or AirPods Pro 3 can then use your audiogram to adjust sounds to match your unique ability to hear.
They help in another way, too. With active Hearing Protection, AirPods Pro 2 and AirPods Pro 3 help minimize your exposure to loud environmental noise across listening modes.
Here’s what you need to know about the hearing health features on AirPods Pro 2 and AirPods Pro 3.
Note: The Hearing Aid, Hearing Test, and Hearing Protection features are not available in all countries and regions.
Cleaning your AirPods Pro 2 or AirPods Pro 3 regularly gives you the best experience.
Take a Hearing Test with your iPhone or iPad
Since the test takes about 5 minutes, find a quiet room before you begin.
- Wear your AirPods Pro 2 or AirPods Pro 3, and make sure they’re connected to your device.
- Open the Settings app on your iPhone or iPad.
- Tap the name of your AirPods near the top of the screen.
- Tap Take a Hearing Test (if you don’t see that option, first tap Hearing Health) and then follow the onscreen instructions.
You may be asked to find a quieter space or adjust the position of your AirPods. If you’ve made several adjustments to the position of your AirPods in your ears, you may need to use different size ear tips before you can start the test.
Your hearing test results will indicate your hearing loss classification and recommend next steps.
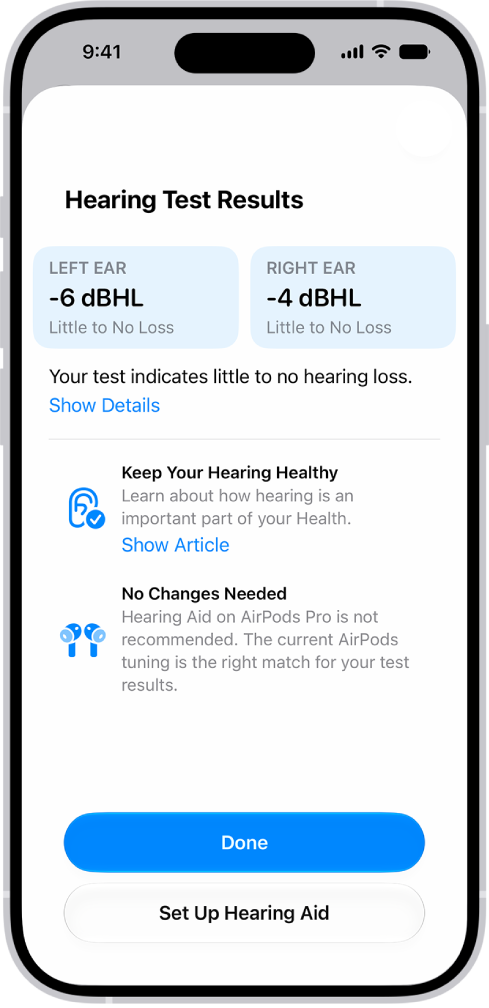
To share your audiogram with your hearing healthcare professional, you can also export a PDF version of it.
Set up Hearing Aid on AirPods Pro 2 or AirPods Pro 3
- Wear your AirPods Pro 2 or AirPods Pro 3, and make sure they’re connected to your device.
- Open the Settings app on your iPhone or iPad and then tap the name of your AirPods near the top of the screen.
- Tap Hearing Assistance (if you don’t see that option, first tap Hearing Health). Then follow the onscreen instructions.
Note: You may need to take the Hearing Test.
Turn on and adjust Hearing Aid on AirPods Pro 2 or AirPods Pro 3
If you’ve already taken a hearing test on your iPhone or iPad, or added audiogram results from your hearing healthcare professional, you can use the clinical-grade Hearing Aid feature on your AirPods Pro 2 or AirPods Pro 3 to adjust sounds to match your unique ability to hear. You can also adjust the Hearing Assistance settings for the Hearing Aid feature, like amplification, balance, and tone.
Note: The Hearing Aid feature is intended for people with perceived mild to moderate hearing loss.
- Wear your AirPods Pro 2 or AirPods Pro 3, and make sure they’re connected to your device.
- Do one of the following:
- iPhone or iPad: Go to the Settings app, tap the name of your AirPods near the top of the screen, and then tap Hearing Assistance (if you don’t see that option, first tap Hearing Health).
- Mac: Go to the System Settings app, click the name of your AirPods in the sidebar (you may need to scroll down), and click Hearing Health.
- Turn on Hearing Aid (if it’s not already on).
- Do any of the following:
- Adjust settings for the Hearing Aid feature, like amplification, balance, and tone: Tap or click Adjustments, then make your changes.
It can take time to adjust to the Hearing Aid feature. For the best experience, make small adjustments over time while your hearing adjusts, instead of changing multiple settings at once or making large adjustments.
Tip: You can also adjust your Hearing Assistance settings in Control Center on your iPhone or iPad. Open Control Center, then tap the Hearing Devices button.
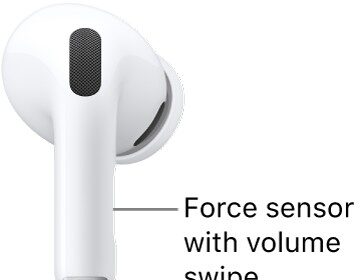
- Allow force sensor with volume swipe to adjust amplification: Tap or click Adjustments and then turn on Swipe to Control Amplification.
You can use the force sensor with volume swipe to adjust amplification when you’re using Transparency mode.
On iPhone, iPad, or Apple Watch, you can adjust amplification no matter which listening mode you’re using. On iPhone or iPad, open Control Center, touch and hold the volume control, then drag the amplification slider. On Apple Watch, open Control Center, tap the AirPods icon on the left (you may need to scroll down), then drag the slider.
- Turn on Conversation Boost: Tap or click Adjustments and turn on Conversation Boost. (You may need to scroll down.)
Conversation Boost focuses your AirPods Pro on the person speaking to you, making it easier to hear face-to-face conversations in noisy environments.
Note: In some countries and regions, Conversation Boost engages automatically without the need to turn it on.
- Allow Own Voice Amplification: Tap or click Adjustments and drag the Own Voice Amplification slider. (You may need to scroll down.)
Own Voice Amplification adjusts the amplification of your voice. The adjustment doesn’t change the amplification of external sounds.
Note: Regions must be HAF v2 approved for Own Voice Amplification to be available.
- This slider is also available in Hearing Assistance settings in Control Center on your iPhone, iPad, or Mac.
- Adjust settings for the Hearing Aid feature, like amplification, balance, and tone: Tap or click Adjustments, then make your changes.
Add audiogram results from your hearing healthcare professional
When you have hearing test results from your hearing healthcare professional, your iPhone or iPad can add them for use with your AirPods Pro 2 or AirPods Pro 3.
- Wear your AirPods Pro 2 or AirPods Pro 3, and make sure they’re connected to your device.
- Open the Settings app on your iPhone or iPad.
- Tap the name of your AirPods near the top of the screen.
- Tap Hearing Assistance (if you don’t see that option, first tap Hearing Health). Then tap Add Hearing Test Result.
Note: You may see an option other than Add Hearing Test Result, such as Use a Prior Test Result or Update Hearing Test Results, if you previously used the Hearing Test feature or added an audiogram.
- Do one of the following:
- Tap Add Hearing Test Results, then answer the required questions.
- Tap Use a Prior Test Result, answer the required questions, then tap Add Hearing Test Result.
Note: This option appears if you previously used the Hearing Test feature or added an audiogram.
- Scan the audiogram with your iPhone or iPad camera, or enter the results manually.
Turn on and adjust Media Assist with AirPods Pro 2 or AirPods Pro 3
When you turn on Media Assist, it enhances audio in media and calls.
- Wear your AirPods Pro 2 or AirPods Pro 3, and make sure they’re connected to your device.
- Do one of the following:
- iPhone or iPad: Go to the Settings app, tap the name of your AirPods near the top of the screen, and then tap Hearing Assistance (if you don’t see that option, first tap Hearing Health).
- Mac: Go to the System Settings app, click the name of your AirPods in the sidebar (you may need to scroll down), and click Hearing Health.
- Turn on Media Assist. Turn Adjust Music and Video or Adjust Calls and FaceTime on or off.
Use the Hearing Protection feature with AirPods Pro 2 or AirPods Pro 3
The active Hearing Protection feature helps protect your hearing across listening modes.
Important: If you have AirPods Pro 3 and your country or region follows EN 352 Standards, you can set up EN 352 Protection to limit the maximum sound level of media. See Use EN 352 Protection with AirPods Pro 3, below.
- Wear your AirPods Pro 2 or AirPods Pro 3, and make sure they’re connected to your device.
- Do one of the following:
- iPhone or iPad: Go to the Settings app, tap the name of your AirPods near the top of the screen, and tap Hearing Protection (if you don’t see that option, first tap Hearing Health).
- Mac: Go to the System Settings app, click the name of your AirPods in the sidebar (you may need to scroll down) and click Hearing Health. Click Hearing Protection.
- Do any of the following:
- Learn more: Tap or click About Hearing Protection to learn more about Hearing Protection.
- Check the fit: On your iPhone or iPad, tap Ear Tip Fit Test or Test Acoustic Seal.
Properly fitting AirPods are required for Hearing Protection to work as intended.
Hearing Protection is off when you select Off Listening Mode, when AirPods Pro have no battery charge, or when Loud Sound Reduction is turned off in Transparency and Adaptive listening modes. See Switch between listening modes and Use and customize Transparency mode.
Use EN 352 Protection with AirPods Pro 3 (not available in all countries or regions)
With AirPods Pro 3, you can use EN 352 Protection, which limits the maximum sound level of media to 82 dBA and meets the applicable EN 352 Standard requirements for hearing protection.
Note: This setting applies only to AirPods Pro 3, and availability depends on whether your country or region follows EN 352 Standards.
- Wear your AirPods Pro 3, and make sure they’re connected to your device.
- Do one of the following:
- iPhone or iPad: Go to the Settings app, tap the name of your AirPods near the top of the screen, and tap Hearing Protection (if you don’t see that option, first tap Hearing Health).
- Mac: Go to the System Settings app, click the name of your AirPods in the sidebar (you may need to scroll down) and click Hearing Health. Click Hearing Protection.
- Do any of the following:
- Learn more: Tap or click About Hearing Protection to learn more about Hearing Protection.
- Check the fit: On your iPhone or iPad, tap Test Acoustic Seal.
Properly fitting AirPods are required for Hearing Protection to work as intended.
- Tap or click Set Up EN 352 Protection, then follow the onscreen instructions.
EN 352 Protection is off when you select Off Listening Mode, when AirPods Pro have no battery charge, or when Loud Sound Reduction is turned off in Transparency and Adaptive listening modes. See Switch between listening modes and Use and customize Transparency mode.
Your AirPods may periodically play a quiet chime while they’re in their charging case. It helps keep your AirPods microphones and speakers operating at their best, for example, so they can provide high-quality hearing test results.
The Hearing Test and Hearing Aid features are subject to regulatory authorization and are not available in all countries and regions.
The Hearing Protection feature works with AirPods Pro 2 or AirPods Pro 3 with the latest firmware when paired with a compatible iPhone, iPad, or Mac device running the latest operating system software. This feature is not available in all regions or all languages. The Hearing Protection feature is not suitable for protection against extremely loud impulse sounds, such as gunfire, fireworks, or jackhammers, or against sustained sounds louder than 110 dBA. The Hearing Protection feature is not suitable for use in all workplaces. Consult with your employer prior to use.
See also