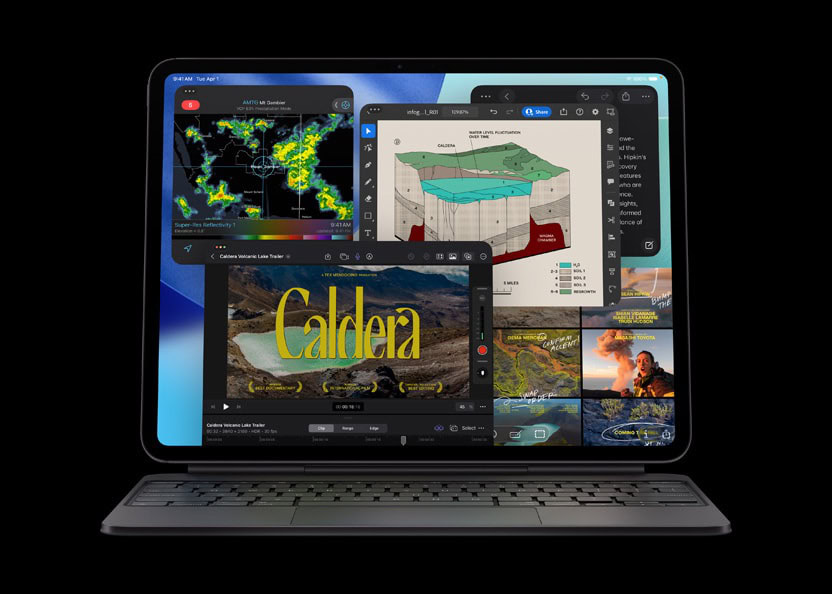
You can connect your iPad to a bigger display, such as a computer monitor, to increase your screen space and get more done. This guide shows you how to use your iPad apps on a second screen or simply mirror your iPad to that bigger display.
Use iPad with a monitor
With the windowing system in iPadOS 26 and newer, you can connect a supported iPad to an external display and use your iPad apps on it as a separate, extended screen — not just as a mirror of your iPad. This works whether you use the new Windowed Apps multitasking or Stage Manager; you no longer need Stage Manager specifically.
Using an external display as a separate, extended screen is supported on these iPad models:
- iPad Air 13-inch (M3)
- iPad Air 11-inch (M3)
- iPad Pro 13-inch (M4)
- iPad Pro 11-inch (M4)
- iPad Air 13-inch (M2)
- iPad Air 11-inch (M2)
- iPad Pro 12.9-inch (5th generation and later)
- iPad Pro 11-inch (3rd generation and later)
- iPad Air (5th generation)
Other compatible iPads can mirror their screen to an external display rather than extend it.
1) Connect a mouse or trackpad to your iPad. You can also connect a keyboard if you need to type anything.
Tip: After connecting your trackpad or mouse, go to iPad Settings > General and tap Trackpad (or Trackpad & Mouse, depending on your accessory), then turn on Two-Finger Secondary Click. This works like right-click or Control-click on a Mac and shows the Quick Actions menu.
2) Decide how you want to multitask. Swipe down from the top-right corner of the screen to open Control Center, then tap the Stage Manager button, or touch and hold it to switch between Stage Manager and Windowed Apps. You can use your iPad apps on a connected display with either mode.
3) Place your iPad in landscape orientation on a stand or cover.
4) Connect your iPad to your display using a USB-C cable. If your monitor doesn’t have a USB-C port, use an appropriate adapter (such as a USB-C Digital AV Adapter) with an HDMI or VGA cable, or a USB-C hub.
5) Switch to the correct input source on your monitor. For example, if you connect your iPad with a USB-C cable, select USB-C as the source on your monitor instead of HDMI.
6) Once connected, your external display shows a desktop with the Dock at the bottom. Move the pointer (from the mouse or trackpad connected to your iPad) toward the external display to move the cursor onto it.
7) Now you can open apps from the Dock or App Library on the external display, and keep using other apps on your iPad screen at the same time.
If you’re only seeing a mirror of your iPad
When you first connect, your iPad may mirror its screen to the monitor, showing the same content on both. Some apps behave differently in this state: video apps like YouTube can send the video to the connected display over AirPlay, apps that block AirPlay (such as Netflix) play on your iPad screen instead of the monitor, and productivity apps like Keynote recognize the monitor as a second display and behave accordingly.
To use the monitor as a separate, extended screen instead of a mirror, make sure your iPad is set to Windowed Apps or Stage Manager. Go to Settings > Multitasking & Gestures and select Windowed Apps or Stage Manager. Your iPad remembers how your displays are arranged, so take note of where the external display sits relative to your iPad—it helps you move the pointer between the two screens.
Once that’s set, here are some things you can do with your iPad apps on the connected display.
Move content between screens
You can copy something from an app open on your iPad’s built-in screen and paste it into an app open on your bigger display.
Resize and move windows
Drag any corner of a window, or the handle in the bottom-right corner, to resize it. Drag the top edge of a window to move it, and place open windows anywhere you like on either screen, where they stay.
Enter full screen
Method 1: Drag a window’s corner outward until the app fills the whole screen.
Method 2: Tap the window controls at the top of the window, then tap the Zoom button to make the app full screen.
When an app is full screen and you don’t see the controls, swipe down from the top of the screen to reveal them in the menu bar. Tapping the Minimize button sends that window to the Dock, and tapping the Close button closes it.
Use multiple windows
When you’re using your iPad with an external display, you can have several app windows open at once and arrange them across both screens.
Use two windows side by side: With one app open, drag another app’s icon from the Dock, App Library, or Spotlight to the left or right edge of the screen. Drag the bar in the middle to adjust the size of each window. You can also drag and drop between windows—for example, drag an image from Photos and drop it into a compose window in Mail.
Keep your windows grouped: Turn on Stage Manager to collect your recent windows along the side of the screen, so you can group apps together and switch between those groups with a tap.
Use a Slide Over window (iPadOS 26.2 or later): You can set one window as a Slide Over window that stays on top of your other windows, and move it off screen and bring it back when you need it.
Move apps from the iPad screen to the display and back
- Use your cursor to drag from the top of an app window to move it from one display to the other.
- Tap the app’s icon in the Dock or App Library on the display where you want to use it.
- Touch and hold the window controls (the Multitasking menu) at the top of a window, then tap Move to Display or Move to iPad.
Give an app the whole display
If you don’t want the Dock or window controls taking up space on the connected display, make the app full screen so it uses the entire screen. Swipe down from the top of the screen at any time to bring back the menu bar and controls. If you’re using Stage Manager, you can turn its recent-apps strip on or off in Settings > Multitasking & Gestures.
Extend your iPad screen to another TV, projector, or display
You can connect your iPad to a TV, projector, or other display using an appropriate cable (USB-C or Thunderbolt, or Lightning on older models) or adapter to mirror or extend its screen. This works with almost all modern iPads.
AirPlay your iPad display to your Mac or Apple TV
You can also mirror your iPad’s display to your Apple TV, Mac, or another AirPlay-supported display without any extra setup. Open Control Center, tap the Screen Mirroring button, and choose your Mac, Apple TV, or a supported TV or monitor from the likes of Samsung, LG, and others.
Don’t see your Mac or TV under Screen Mirroring? Try these checks to fix the issue:
1) Make sure your display (Mac, Apple TV, or AirPlay screen) and your iPad are on the same Wi-Fi network.
2) Make sure AirPlay is enabled on the receiving display:
- Mac: Go to System Settings > General > AirDrop & Handoff and turn on AirPlay Receiver. Then set Allow AirPlay for to Everyone, and your Mac should appear as a screen mirroring option on your iPad.
- Apple TV: Go to Settings > AirPlay and HomeKit and turn on AirPlay. Then go to Allow Access and set it accordingly.
- Third-party AirPlay TVs: You may need to enable AirPlay in the TV’s settings or open an AirPlay receiver app on the smart TV.
3) If nothing helps, restart your iPad, Mac, or Apple TV, and try again.
See also: How to Screen Mirror Your iPhone to a TV or Computer