Several users have said that they see the following error message when they want to use Apple Music.
The error message says: This account does not have iCloud music enabled. Apple Music has not been linked to this account.
If you are having this issue, then this article is for you. It appears that this issue affects the iPhone users.
Please try the troubleshooting steps below in order. After trying each step below, test to see if you’ve fixed your issue.
1. First, check to see if there are any Apple Music outages. You can check if there are any service interruptions by visiting the Apple System Status page. Here is how:
- Visit the Apple Status page.
- This page lists all of Apple’s online services.
- Find Apple Music.
- If you see a green dot icon next to Apple Music, then everything is up and running.
- If there are issues, you will see other icons such as red or yellow triangle icons. The page will provide you with more details regarding outages.
2. Restart your device. Here is how you can restart your device:
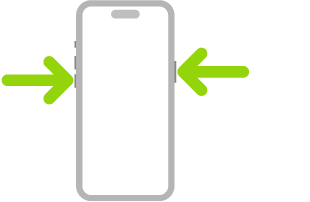
- Simultaneously press and hold the side button and either volume button until the sliders appear, then drag the Power Off slider.
3. Please ensure that your devices have the latest version of iOS. You can easily update your iPhone 18 Pro to the latest version of iOS. Here is how:
- Update your iPhone 18 Pro: Go to Settings > General > Software Update. And if there is an update available, follow the onscreen instructions.
4. Check your network connection. You need a cellular data or Wi-Fi connection. You may try the following tips:
- Turn on Airplane Mode and wait 10 seconds and then turn it off.
- Restart your router. Simply unplug it from its power source, wait for 10 seconds and then replug.
- Make sure that your device is not too far from your router.
5. Sign out and sign in.
- On your iPhone 18 Pro: Go to Settings > [your name] > Media & Purchases > and tap Sign Out. And restart your iPhone and then go back to Settings and Sign In.
6. Check the date and time. Make sure that your date and time settings are correct. Here is how you can check and then edit if they are not correct:
- On your iPhone: Tap Settings > General > Date & Time.
You will also see an option to turn on “Set Time Automatically”. Turn this on.
7. Turn off and on Sync Library. If it is already off, turn it on. Here is how:
- On your iPhone 18 Pro: Settings > Apps > Music. And turn on Sync Library.
8. Reset network settings. On your device, go to Settings > General > Transfer or Reset iPhone > Reset > Reset Network Settings. Please note that this will wipe out all of your network settings. For example, your saved Wi-Fi passwords will be erased.