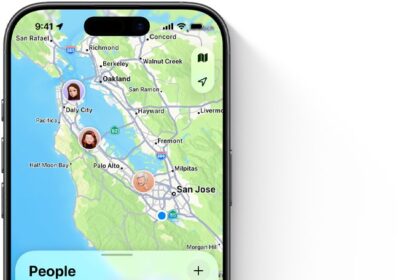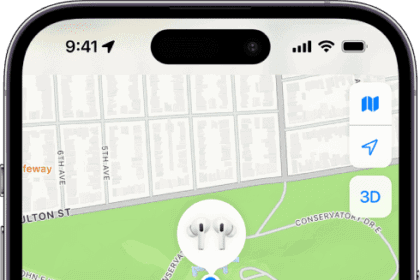
Find My lets you mark items as lost to help recover items you can’t find or that might be stolen. Marking something as lost puts the hardware into a special Lost Mode and lets you provide details to someone who finds it—or even to a thief you want to encourage to return it.
Apple labels the feature as Lost Device Type on the Find My sheet and Mark As Lost in macOS 26 and earlier when you Control-click/right-click a device in Find My for Mac’s device list. However, the option to turn the feature on is labeled Lost Mode.
This information is available differently (or not at all) based on the kind of thing that’s marked as lost:
- Devices: For devices, you can enter text (such as offering a reward) and provide your phone number. Both appear on the device.
- AirTags and other items: With a Find My item—like AirTags or a Pebblebee Card—you can provide your phone number or email address; Apple prefills the message “This item has been lost. Please call me.” This information appears on a webpage associated with the device, which a finder can retrieve as described in how to identify an AirTag you have found.
- Audio hardware without a screen: AirPods (3rd generation), AirPods 4 with Active Noise Cancellation, AirPods Pro, and AirPods Max can provide contact info just as with a Find My item. (The 1st- and 2nd-generation AirPods, AirPods 4 without ANC, and Beats models that support the Find My network can’t be marked as lost.)
Because devices have screens, marking a device as lost puts the finder on notice that you know approximately where it is—they can see that from the lock screen. If your hardware is stolen, this is a way to tell a thief that you have their location and advise them to give it up.
With supported Apple audio hardware or a Find My item, it’s trickier, as a finder has to take additional steps to determine its status rather than looking at a screen or receiving an alert—although they will hear an item make a sound or sounds in certain circumstances: see what an “AirTag Found Moving With You” alert means for those cases.
Mark a device as lost
When a device is marked as lost, it is locked and can be unlocked only with a device passcode (iPhone, iPad, or Apple Watch) or an Apple Account password or a macOS account password (Mac). Apple Pay is disabled, and all associated cards are temporarily suspended.
Even though Apple audio hardware that can be marked as lost appears in the Devices list, the options for a lost set of earbuds or headphones are the same as a lost item, described later in this chapter.
In case you’re thinking of testing this on your Mac, be aware that your computer restarts instantly after you confirm Lost Mode. You might lose unsaved work in progress.
- Tap or click Lost Mode beneath Lost Device Type.
- Apple explains what will happen to the device in a screen labeled Lost Mode (iPhone, iPad, or Apple Watch), or “Lock this Mac?” Tap or click Continue to proceed or Cancel to back out.
- Enter a passcode if prompted and verify it. (This is unlikely, but it may happen. Make a note of the passcode so you aren’t locked out.)
- On devices other than Macs or supported audio devices, optionally set a phone number for a call back. On an iPhone, a finder can call only that number. On other devices, the call-back number is displayed. Tap or click Next.
- Optionally, for devices that offer it, enter a message that will appear on the device. In this step, the dialog shows that a passcode has already been set and will be used to lock the device. Tap or click Next.
- On the final screen for anything but a Mac, you see a summary of actions and information:
- Notify When Found: Enable if you want device-based notifications on all your linked hardware.
- Text you entered: The text of the phone number and messages you entered, if any, appears, but you can’t modify it.
- Receive Email Updates: This adds email to notifications as part of how you’re alerted.
Despite Apple’s explicit promise when locking a Mac that “This message will be shown on your Mac when someone turns it on,” I can confirm in Tahoe and Golden Gate, it is not. I don’t understand why Apple doesn’t show the message, and why they document it incorrectly.
Tap or click Enable or Activate for anything but a Mac, where you tap or click Continue or Lock.
After you activate Lost Mode, the action is passed to the device if it’s online, and an email message (if enabled) is sent to the address for the Apple Account for the device, confirming what you’ve done. Devices with batteries will be placed in low-power mode. On an iPhone, emergency service calls remain available. Credit and debit cards associated with Apple Pay are disabled on the device.
When a device is locked, it appears in the Devices view with its icon overlaid with a white question mark in an orange circle. A Mac additionally shows a gray screen.
If Location Services has been turned off by you or someone with access to your devices, Lost Mode overrides that and re-enables it so you can track your device.
Turn Lost Mode off again
- Select the device in the Find My app.
- Tap or click Turn Off Lost Mode, except on an Apple Watch, where you tap the Lost Mode button and disable Lost Mode.
- Find My prompts you with a warning that explains the device will remain locked, but the information you entered (phone number and message) and its location history will be deleted. Tap or click Turn Off to confirm.
- When you recover the device, enter its passcode or password.
- Then, you can disable Lost Mode: Enter your passcode.
Whether you use Find My or start directly from your iPhone, iPad, or Apple Watch, your device will prompt you to re-enter your Apple Account password once or twice. If you have separate iCloud and media Apple Accounts linked, read the dialog carefully so you enter the correct password for each.
To unlock a Mac, despite Apple promising you can do so via Find My or via iCloud.com/find, the truth in testing in Tahoe and Golden Gate is that you can only unlock your Mac while in front of it, going through a separate procedure.
What happens to Apple Pay
In some cases, you may be prompted for two-factor authentication to finish regaining access; in many recent tests, I was not, but I don’t know why. For accounts using code-based verification, you will have to use a trusted device other than the one you have in hand or a trusted phone number to validate your sign-in. With a hardware security key, it’s already independent and can simply be used if you’re prompted; you may be asked to use code-based verification, however. If you’re prompted a second time for your Apple Account password, no second factor appears to be required.
Mark as Lost immediately disables Apple’s side of Apple Pay for a lost device, which prevents even someone with your passcode from using Apple Pay. (When they use the passcode, this disables Lost Mode, but you would be notified.) You may see a flurry of “card deactivated” emails and texts from your credit card companies and banks as well as an email alert from Apple.
To re-enable your cards for Apple Pay, you will be in one of two states:
- Wallet sync active: With Wallet enabled for syncing—Settings/System Settings > Account Name > iCloud > See All—when you re-enter your Apple Account password after unlocking the device, your cards are re-synced and activated. This may result in a similar flurry of “card reactivated” messages.
- Wallet sync inactive: Without Wallet sync, your device deletes all locally stored card information when Lost Mode is activated. You have to manually re-enter cards that you want to use for Apple Pay on that device.
Do the same from iCloud.com
The iCloud web app for Find My iPhone diverges slightly from the Find My app, and mobile devices have a different process than Macs.
Lost Mode activates immediately when you click Activate at the last step — there are no extra options or final review stage.
Here’s how to proceed for an iPhone, iPad, iPod touch, Apple Watch, AirPods Pro, or AirPods Max:
- Select the device.
- On the sheet that appears, click Lost Device Type.
- Read the disclosure of what will happen when it’s locked and click Next to proceed.
- In the unlikely event the device doesn’t have a passcode set, you have to invent one and set it at this point.
- Enter a phone number that will be displayed (optional). Click Next.
- Enter a message that will be displayed (optional). Click Activate.
You can unlock these devices using the same methods as when they are locked in a native Find My app.
Lost Mode restarts a Mac immediately when you click Lock at the last step.
Macs are handled slightly differently; here are the alternative steps:
- Select the Mac.
- Click Lost Mac.
- Click Next after reading the disclosure.
- You have an option to enter a message before you click Lock.
The Mac is now locked and powers down. See how to unlock a Mac you locked with Find My for how this appears and your next steps.