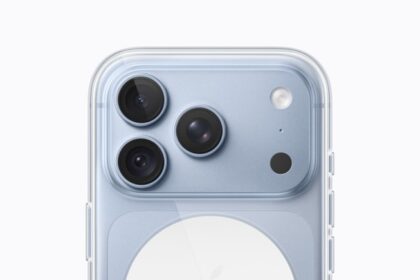
Several iPhone 18 Pro and iPhone 18 Pro Max users have said that Wi-Fi won’t turn on when they try to enable it. More specifically, it appears that users are unable to join to a Wi-Fi network because the Wi-Fi switch does not seem to work. Simply, tapping the Wi-Fi slider does not function. This article explains how you can fix this problem.
Please try these troubleshooting steps below in order. After trying each step, test your iPhone 18 Pro or iPhone 18 Pro Max again to see if you can turn on Wi-Fi.
1. Airplane Mode
On your device, turn Airplane Mode on and off. Wait five seconds between turning Airplane Mode on and off. To do that:
- Open Control Center and then tap the Airplane Mode button.
- Or, alternatively, you can go to Settings > Airplane Mode.
2. Restart your iPhone
Simply restarting your device may fix your issue. Here is how you can restart your device.
- Press and hold either volume button and the side button until the power-off slider appears.
- Drag the slider, then wait 30 seconds for your device to turn off.
- To turn your device back on, press and hold the side button (on the right side of your iPhone) until you see the Apple logo.
3. Force restart your device
If restarting does not solve your Wi-Fi problem, then please force restart your device. Here is how:
- Press and quickly release the volume up button.
- Press and quickly release the volume down button.
- Press and hold the side button until you see the Apple logo (this might take longer than 10 seconds).
4. Update your device
Try updating your iOS software. Since you are unable to use Wi-Fi, updating your device over Wi-Fi wirelessly is not possible. However, you can still update your device using your computer. Here is how:
- Connect your iPhone to your computer with a USB cable.
- On your computer:
- Open the Finder window on a Mac with macOS Catalina or later. Connect your device to your computer. Select your device in the left sidebar of the Finder window. Click General, then click Check for Update. Click Download and Update. Continue following the onscreen instructions. If asked, enter your passcode.
- Open iTunes on your Mac with macOS Mojave or earlier or on your Windows PC. Connect your device to your computer. Click the device button in iTunes toolbar. Click the Summary tab. Click Check for Update. Click Download and Update. Continue by following the onscreen instructions. If asked, enter your passcode.
- Connect your Apple device to your Windows device. In the Apple Devices app on your Windows device, select the device in the sidebar. Select General in the sidebar. Select Update. You may need to first select Check for Update to see if an update is available. If an update is available, the Update button appears.
5. Reset network settings
Resetting network settings may fix this. Please note that resetting your network settings causes all network settings to be removed, including your home, work, and school network configurations. Here is how:
- Open the Settings app.
- Tap General.
- Tap Transfer or Reset iPhone.
- Tap Reset.
- Tap Reset Network Settings. This resets all Wi-Fi networks and passwords, cellular settings, and VPN and APN settings.
6. Backup and restore
This is the last resort. This will erase everything. Thus make sure that your back up your iPhone. You can use iCloud to back up but since you have no Wi-Fi connection, this option would not work. However, you may have a recent backup. Go to Settings > [your name] > iCloud > iCloud Backup.
If you want to back up, connect your device to your computer. Switch to the Finder on your Mac, or open the Apple Devices app on your PC. If your PC doesn’t have the Apple Devices app, or your Mac is using macOS Mojave or earlier, open iTunes instead. Select your device in iTunes. Click General in the Apple Devices app or Summary in iTunes. Click Back Up Now.
After backing up, now restore your device to its factory settings. Again this will erase everything. Before you restore, turn off Find My: go to Settings, tap your name, tap Find My, tap Find My iPhone, turn Find My iPhone off, then enter your Apple Account password. Here is how:
- Connect your device to your computer.
- If you see the “Allow accessory to connect?” alert on your computer, click Allow.
- Open the Finder on Mac or the Apple Devices app on a PC.
- Select your device when it appears on your computer.
- If a message asks for your device passcode or to Trust This Computer, follow the onscreen steps.
- Click Restore iPhone on your computer.
- Click Restore to confirm. Your computer erases your device and installs the latest iOS, iPadOS, or iPod software.
After this, set up your device as new. And test to see if Wi-Fi is working. If it is not working, restore your device from your backup. Here is how:
- Open the Finder or the Apple Devices app on Windows. Open iTunes on Windows without the Apple Devices app or macOS Mojave or earlier.
- Connect your device to your computer with a USB cable. If a message asks for your device passcode or to Trust This Computer, follow the onscreen steps.
- Select your iPhone when it appears in the Finder window, the Apple Devices app sidebar, or the iTunes window.
- Select Restore Backup.
- Look at the date of each backup and pick the most relevant.
- Click Restore and wait for the restore to finish. If asked, enter the password for your encrypted backup.
- Keep your device connected after it restarts and wait for it to sync with your computer. You can disconnect after the sync finishes.
If you have tried everything and are still having this problem, it is time to contact Apple.
- Apple live chat support.
- Reserve a Genius Bar appointment.
- Check your Apple warranty.