


Having problems updating your iPhone 17 Pro or iPhone 17 Pro Max to the latest version of iOS? There are a few reasons why you can face these issues. Don’t be disheartened, though—there’s usually a simple solution to the problem.
Let’s look at some fixes that will help you get the latest iOS running on your iPhone 17 Pro properly. Here’s how to fix your iPhone 17 Pro when it won’t let you update iOS.
1. Charge Your iPhone 17 Pro
Let’s start with some basics before diving into more advanced troubleshooting. As you probably know, your iPhone 17 Pro or iPhone 17 Pro Max won’t let you upgrade software if you don’t have enough battery power. This is to prevent your device from shutting off in the middle of an update, which can cause serious problems.
Make sure you plug in your iPhone 17 Pro and have plenty of battery charge before starting the iOS update. It’s a good idea to leave it on the charger while the process runs, too. That way, if it takes longer than expected, your phone won’t run out of power.
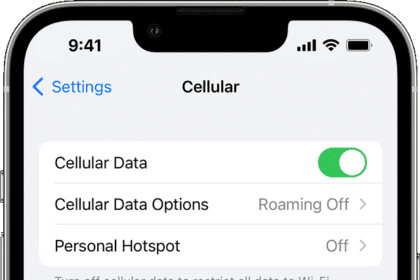
2. Make sure your phone has access to Wi-Fi
Your iPhone 17 Pro won’t update if it doesn’t have a Wi-Fi connection.
Make sure you’re connected to a reliable Wi-Fi network when you try to update. Some updates, because they are so large, require a Wi-Fi connection. We recommend using Wi-Fi instead of cellular data when downloading updates, as it’s faster and won’t eat into your data plan.
Open Settings and tap Wi-Fi. Make sure the switch next to Wi-Fi is on, and that a checkmark appears next to the name of your Wi-Fi network.
The best way to ensure your iPhone can update is by performing the update at home or in an office where you have access to reliable Wi-Fi network.
It’s worth restarting your router if you haven’t done so in a while. If you have continued issues, you might also try connecting to another network and seeing if you have the same issue there.
3. Ensure you have enough available storage
Next, check if your iPhone 17 Pro has enough room to store the update
Go to Settings > General > iPhone Storage. In this menu, you’ll see how much storage you have used and remaining. Depending on what’s taking up space, your phone will provide a few recommendations, including:
- Offload Unused Apps
- Review your photos and videos
Let’s look at what these do.
Offload Unused Apps deletes the install data for any apps that you rarely use. This won’t delete any of your personal files; only the app data itself is deleted. When you want to use the app again, you can redownload it as long as it’s still available on the App Store.
Review your photos and videos lets you review your media files including screenshots, duplicates so you can delete items you don’t need. This is often an easy way to gain a big chunk of storage, especially if you have stored a lot of videos and photos on your iPhone 17 Pro.
Once you’ve increased your free space, try the iOS update again.
4. Wait a While Before Updating
When Apple releases a new iOS update, millions of people are connecting their iPhones to Apple servers to download and install it. With all those people connecting simultaneously, Apple’s server may struggle to keep up, which could be the reason why your iPhone 17 Pro won’t update.
If you receive an error when trying to update to the latest version of iOS, try waiting for a while. You should have better luck later when the update servers aren’t under as much strain.
The update menu lets you schedule a system update to run overnight, when most people in your area won’t be trying to update. Try that, and if it doesn’t work either, visit Apple’s website to see if their servers are working properly.
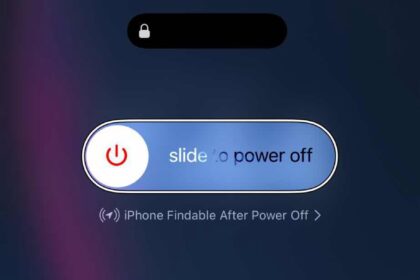
5. Restart your iPhone
If your phone hasn’t been restarted in a while, there could be a glitched app or other temporary issue preventing the update from occurring.
Rebooting a computer can resolve a lot of problems, and your iPhone 17 Pro is no exception to this rule. Simply turn your iPhone 17 Pro off and back on, then try to update again.
6. Update your iPhone 17 Pro using your computer
While most people are used to updating iOS right on their iPhone, you can still run a system update through your computer with iTunes or Finder. It’s not quite as convenient, but can come in handy if the over-the-air update isn’t working for you. This is also a solution if you can’t create enough free space on your device.
- Connect your iPhone 17 Pro and your computer with a cable.
- Do one of the following:
- On a Mac (macOS 10.15 or later): In the Finder sidebar, select your iPhone, then click General at the top of the window.
- On a Mac (macOS 10.14 or earlier) or a Windows device: Open the iTunes app, click the button resembling an iPhone near the top left of the iTunes window, then click Summary.
- Click Check for Update.
- To install an available update, click Update.
7. Delete Old Update Data
If you try to install an iOS update and it fails, the update data sits on your device so you don’t have to re-download it. But if there’s something wrong with what you downloaded, you need to delete it to force your iPhone to run the update again.
To do this, go to Settings > General > iPhone Storage, check to see if the update has already downloaded. Scroll down the list of apps below the Storage Recommendations and look for an iOS update. If you see the update file, tap on it, then tap Delete Update.
Now that the iOS update is deleted, go to Settings > General > Software Update to download the update again.
8. Reset Network Settings
If you still can’t update your iPhone 17 Pro, reset your network settings to start fresh. Note that this will clear out all network preferences you’ve saved, so you’ll need to reconnect to all previously saved Wi-Fi networks again. This will also reset any VPN configurations you use, as well as Bluetooth connection settings.
To reset network settings on your iPhone 17 Pro:
- Open Settings and tap General.
- Scroll down to Transfer or Reset iPhone.
- Select Reset at the bottom, followed by Reset Network Settings.
- Enter your passcode and confirm you want to do this.
Once you reset your Wi-Fi configuration, reconnect to a strong Wi-Fi network and try the iOS update again.
9. Reset All Settings, Then Factory Reset
If your iPhone 17 Pro still won’t update, you should consider wiping your device. In the same Reset menu mentioned above, you can either reset all settings on your iPhone or perform a factory reset to erase everything.
Resetting your settings probably won’t fix an update issue, but it’s worth a try first if nothing else has worked. Keep in mind that this will change all options back to their defaults, so you’ll have to configure options like privacy preferences and notifications again:
- Launch Settings > General.
- Choose Transfer or Reset iPhone.
- Select Reset > Reset all settings.
- Confirm with your passcode.
All your settings are now reset; try to update again once you reconnect to Wi-Fi. If it works, great! You’ll need to put all your settings back as they were. If that didn’t fix your problem, you can go to the most extreme route and reset your device to factory defaults.
Keep in mind that factory resetting will erase all the data on your iPhone 17 Pro. Make sure you’ve backed up your iPhone before proceeding so you don’t lose any information.
Here’s how to factory reset your device:
- Open Settings > General.
- Hit Transfer or Reset iPhone.
- Select Erase All Content and Settings from the bottom of the page.
- Walk through the steps, including entering your passcode to confirm.
Your device will now revert back to its factory state. Because everything is fresh again, you’ll hopefully be able to update without issue. You can restore your iPhone backup during the setup process.
iPhone 17 Pro Updating Troubles: Fixed!
It’s frustrating when your phone won’t let you update. Hopefully, one of these fixes solved your problem and you can now enjoy the latest version of iOS. Let us know which solutions worked for you in the comments section below.


