Here are some essential things you must do after dropping your iPhone in water or after it gets drenched in the rain, shower, or other liquid.
- Is my iPhone waterproof or water-resistant?
- iPhone models and their IP ratings
- No official IP rating
- Rated IP67 (maximum depth of 1 meter up to 30 minutes)
- Rated IP68 (maximum depth of 2 meters up to 30 minutes)
- Rated IP68 (maximum depth of 4 meters up to 30 minutes)
- Rated IP68 (maximum depth of 6 meters up to 30 minutes)
- What affects the water resistance of an iPhone?
- Can I claim the warranty and free repair for liquid damage on my water-resistant iPhone?
- What to do after you drop your iPhone in the water
- 1. Unplug everything, and turn it off
- 2. Remove the case
- 3. Wipe the iPhone carefully
- 4. Eject the SIM tray and unplug cables and accessories
- 5. Let the iPhone dry
- 6. Don’t put your iPhone in rice — and don’t seal it in an airtight box either
- 7. Check whether water is trapped in the speaker or microphone
- 8. Wait for a reasonable time, like 24 hours, and you’re now ready to use your iPhone
- 9. If it won’t turn on, force restart it before you panic
- 10. Back up your iPhone the moment it comes back to life
- 11. Check your AppleCare coverage before you pay for anything
- 12. Get your device inspected, but don’t argue with an Apple Genius; they know if you’re lying!
- Tips for the future to keep your iPhone safe from water
But first, some basics.
Is my iPhone waterproof or water-resistant?
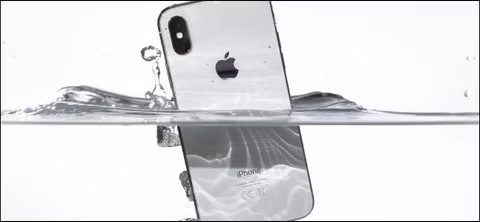
No iPhone ever released is fully waterproof.
Instead, the iPhone 7 and later are water resistant, which means they will protect your device from splashes of water, moisture, and dust.
But there is no guarantee. And if water gets inside your iPhone and destroys it, Apple won’t be responsible, as liquid damage isn’t covered under the warranty — though you may have rights under consumer law in your country or region.
But don’t get disheartened. Apple rates iPhone XR and later as resistant to accidental spills from everyday liquids such as soda, beer, coffee, tea, and juice, so the device should work fine if a glass of water, drink, or juice falls on your iPhone in a restaurant, it gets wet in light rain, or it falls in a tub of water. However, make sure you follow the tips we explain below.
iPhone models and their IP ratings
iPhone 7 and newer models have an official IP rating with varying degrees of depth and time they can be submerged in water. These are the officially stated IP ratings of iPhones as mentioned on their respective Apple Support technical specifications page.
No official IP rating
- Original iPhone to iPhone 6S
- iPhone SE (1st generation)
Rated IP67 (maximum depth of 1 meter up to 30 minutes)
- iPhone 7
- iPhone 7 Plus
- iPhone 8
- iPhone 8 Plus
- iPhone X
- iPhone XR
- iPhone SE (2nd generation) (2020)
- iPhone SE (3rd generation) (2022)
Rated IP68 (maximum depth of 2 meters up to 30 minutes)
- iPhone XS
- iPhone XS Max
- iPhone 11
Rated IP68 (maximum depth of 4 meters up to 30 minutes)
- iPhone 11 Pro
- iPhone 11 Pro Max
Rated IP68 (maximum depth of 6 meters up to 30 minutes)
- iPhone 12 mini
- iPhone 12
- iPhone 12 Pro
- iPhone 12 Pro Max
- iPhone 13 mini
- iPhone 13
- iPhone 13 Pro
- iPhone 13 Pro Max
- iPhone 14
- iPhone 14 Plus
- iPhone 14 Pro
- iPhone 14 Pro Max
- iPhone 15
- iPhone 15 Plus
- iPhone 15 Pro
- iPhone 15 Pro Max
- iPhone 16
- iPhone 16 Plus
- iPhone 16 Pro
- iPhone 16 Pro Max
- iPhone 16e
- iPhone 17
- iPhone 17 Pro
- iPhone 17 Pro Max
- iPhone Air
- iPhone 17e
See also: Does AppleCare Cover iPhone Water Damage? Here’s The Truth!
What affects the water resistance of an iPhone?
iPhone’s water resistance capability isn’t a permanent characteristic. Regular use and wear over time may decrease water and dust resistance.
Furthermore, the resistance may degrade if you often drop your iPhone in sea/salty water or if it gets frequent splashes of corrosive liquid like juices, drinks, etc. Apple also warns against swimming or bathing with your iPhone, exposing it to pressurized or high-velocity water such as a shower or jet ski, and using it in a sauna or steam room.
Finally, a screen or battery repair (usually by non-certified technicians) can totally remove or diminish the resistance capability — Apple specifically lists disassembling your iPhone, including removing screws, as something that can compromise it. So it would be best if you took special precautions with your repaired iPhone.
Can I claim the warranty and free repair for liquid damage on my water-resistant iPhone?
You cannot do so. Apple states plainly that service for liquid damage isn’t covered by the Apple One-Year Limited Warranty, although you might still have rights under consumer law where you live.
What to do after you drop your iPhone in the water
If your water-resistant iPhone was in the water or had a splash of water for a few seconds, the initial few tips mentioned below are enough. However, if your non-water-resistant iPhone fell in water or your water-resistant iPhone stayed submerged in liquid for a long time, you must follow nearly all the tips mentioned here.
1. Unplug everything, and turn it off
The very first thing Apple tells you to do is unplug all cables and accessories, and not to charge the device until it is completely dry. If your iPhone shows a "Charging not available" or "Liquid Detected" alert when something is connected, disconnect the cable immediately.
Powering the iPhone off the moment you take it out of the water isn’t a step Apple documents, but plenty of technicians recommend it, and it costs you nothing: switching it off reduces the chance of a short circuit if water has seeped inside the device. Once you turn off the iPhone, follow the remaining solutions.
Caution: Never plug your wet iPhone into a charger! Apple says to allow at least five hours before charging with a Lightning or USB-C cable or connecting an accessory. Wireless charging is the safer option in the meantime — just wipe the back of the iPhone dry first and make sure it’s dry before you place it on a compatible charging mat.
2. Remove the case
Water will stay stuck in the gap between the case and the iPhone. Slowly, it may seep inside the SIM tray or weaken the water-resistant bond and get in. In addition to that, water has certain elements that can leave gray residues and become corrosive if left unaddressed. Therefore, remove the case and jump to the next tip.
3. Wipe the iPhone carefully
If a liquid other than water splashed on your iPhone — soda, juice, coffee, sunscreen, perfume — rinse the affected area with tap water first.
Then take a soft, lint-free cloth, like a lens cloth, and wipe your iPhone to dry water from its surface. Avoid a bath towel or anything that sheds fibers. Get rid of water that may be stuck around the volume buttons.
Apple is explicit that your iPhone must be dry before you open the SIM tray, so don’t skip ahead to the next step until you’ve done this one.
4. Eject the SIM tray and unplug cables and accessories
This tip only applies to iPhones with a physical SIM slot. Many current models don’t have one: every iPhone 14 and later sold in the United States is eSIM only, iPhone Air is eSIM only in every country, and the iPhone 17 lineup ships without a SIM tray in a number of other markets too. If your iPhone has no tray, skip this step.
Once the phone is wiped and dry on the outside, hold it in such a way that the SIM slot faces down. This will ensure liquid that may be stuck in the SIM tray casket slips because of gravity and doesn’t go inside.
Next, while holding the iPhone the same way, get the SIM ejector tool or one of its easy alternatives and take out the SIM tray. Tap the iPhone gently against your hand with the slot facing down to encourage any fine water droplets out rather than further in.
For now, keep the SIM tray outside the iPhone. Also, gently wipe the SIM card and keep it aside.
5. Let the iPhone dry
After following the above tips, just leave your iPhone to dry. Don’t power it on or insert the SIM tray.
Apple’s own drying method is simple: tap the iPhone gently against your hand with the Lightning or USB-C connector facing down to shake out excess liquid, then leave it somewhere dry with a bit of airflow. Apple notes that parking it in front of a fan blowing cool air straight into the connector can speed things up.
6. Don’t put your iPhone in rice — and don’t seal it in an airtight box either
For a long time, people thought that putting their wet phone or electronics in rice helps. But that’s not entirely true. Unknown to most people, putting your iPhone in rice to dry can cause more trouble as tiny broken rice particles or starch may block the speaker grills and line itself around the iPhone. Apple says the same thing in as many words: don’t put your iPhone in a bag of rice, because small particles of rice can damage it. Overall, it’s an impractical solution with no real benefit.
The silica gel packet trick has the same problem in reverse. Sealing a wet iPhone inside an airtight lunch box works directly against what Apple recommends, which is open air and gentle circulation. Leave the phone out in a dry room with some airflow instead, and give it time.
Apple also warns against three things people reach for in a panic:
- Don’t dry your iPhone with an external heat source — no hair dryer, no radiator, no oven, no direct sun.
- Don’t use compressed air.
- Don’t poke anything into the connector, including cotton swabs and paper towels.
7. Check whether water is trapped in the speaker or microphone
If your iPhone sounds muffled afterward, Apple has a straightforward test: place the iPhone speaker side down on a lint-free cloth and see whether water drips out. Water sitting in the opening can degrade speaker and microphone performance until it fully evaporates, so the fix is the same as before — dry the phone in open air and wait.
There’s no built-in water-eject feature on iPhone the way there is on Apple Watch. Third-party shortcuts and apps that play a low-frequency tone through the speaker are popular, but they require powering the phone on and turning the volume up, so only consider them if your iPhone wasn’t submerged for long and it’s already safe to switch on.
8. Wait for a reasonable time, like 24 hours, and you’re now ready to use your iPhone
After following the above steps, you’ll have to take a forced break from your iPhone and leave it turned off for about 24-36 hours. Apple’s guidance lines up with this: five hours is the minimum before you try a cable, and a fully soaked phone can take up to a day to dry out completely.
Once that’s done, power on your iPhone, and if it boots up, congratulations. Use it for a few minutes and ensure the touchscreen, speakers, earpiece, and charging port are working correctly. Then, insert your SIM card, put the case back on, and enjoy your iPhone like before.
If the liquid-detection alert reappears when you plug in, there’s still moisture in the connector or under the pins of your cable. Unplug, wait longer, and try again later.
9. If it won’t turn on, force restart it before you panic
A phone that stays black after a day of drying isn’t necessarily dead. Apple’s documented recovery step is a force restart, and the button sequence depends on your model.
- iPhone with Face ID (and iPhone 8, iPhone SE 2nd/3rd generation): press and quickly release the volume up button, press and quickly release the volume down button, then press and hold the side button until you see the Apple logo. Apple warns this might take longer than 10 seconds, so don’t let go early.
- iPhone 7 and iPhone 7 Plus: press and hold the side button and the volume down button together until the Apple logo appears.
- iPhone 6s and earlier: press and hold the Home button and the side or top button until the Apple logo appears.
Apple’s next instruction is to charge the iPhone for one hour and try again — but that only applies once the phone is genuinely dry. If yours has been swimming, finish the drying window first. A wireless charger is the safer way to put a charge into it while you’re still unsure about the connector.
10. Back up your iPhone the moment it comes back to life
This is the step almost every water-damage guide skips, and it’s the one you’ll regret missing. Liquid damage often isn’t instant — corrosion works slowly, and a phone that boots up fine on day one can fail on day five. Get your data off it while you still can.
Open the Settings app, tap your name, then tap iCloud. Tap iCloud Backup, then tap Back Up Now, and stay on Wi-Fi until it finishes. The date and time of your last backup appears underneath Back Up Now, so you can confirm it actually completed.
If you’d rather not wait on iCloud storage, back up to a Mac or PC instead — a cable backup is faster and doesn’t care how much iCloud space you have left. Just make sure the connector is fully dry before you plug anything in.
11. Check your AppleCare coverage before you pay for anything
The Apple One-Year Limited Warranty won’t help you here, but AppleCare and AppleCare One both cover accidental damage from handling, and Apple explicitly lists liquid damage as part of that protection. That turns an unpredictable repair bill into a flat service fee.
To check what you have, go to Settings > General > AppleCare & Warranty, then tap your device. You can also enter your serial number at checkcoverage.apple.com, or sign in at mysupport.apple.com and choose your device.
As of this writing, Apple’s published service fees for iPhone are $29 for screen or back glass damage and $99 for other accidental damage, plus applicable tax. Liquid damage falls into that second bucket. Fees differ by country and product, so check Apple’s fees and deductibles page for your region before you assume the number.
12. Get your device inspected, but don’t argue with an Apple Genius; they know if you’re lying!
In case your iPhone was submerged in water for an unreasonably long time, or its water resistance powers were non-existent, and it suffered liquid damage fixable beyond the scope of the above tips, your only option is to get it inspected by a technician.
Chat with Apple Support using another device or visit a nearby Apple Store/Apple-certified service center and get your iPhone fixed.
In the hope of getting the device repaired under warranty, some people debate with the technician and refuse to admit that they (accidentally or intentionally) kept their iPhone in water for a long time.
However, arguing is of no use! iPhones have a Liquid Contact Indicator (LCI) inside the SIM tray slot on models that have one — one of the most obvious points of water ingress. If there is no water damage, the LCI is white or silver. However, if the water gets in the iPhone and comes in contact with the Liquid Contact Indicator, it turns fully red. You can check this yourself by taking out the SIM tray and shining a bright light inside; Apple suggests using a lighted magnifying glass and angling the light or the device to see it clearly.
One thing worth knowing: an LCI won’t trip from ordinary humidity or temperature swings that fall inside the iPhone’s stated environmental limits. And on eSIM-only models with no SIM tray — including iPhone Air, and iPhone 14 and later sold in the US — there is no externally visible LCI to inspect at all, so a technician has to open the device.
Once the Liquid Contact Indicator is red, there is little point disputing it with Apple Store staff, as liquid damage isn’t covered under warranty. Apple does say that if you aren’t sure liquid exposure is actually causing the problem, you should have Apple or an Apple Authorized Service Provider inspect the device even when the LCI reads red — so it’s worth asking rather than assuming the worst.
It doesn’t matter if Apple showed you 50 advertisements showing the iPhone is water resistant, or if you bought an expensive iPhone especially for water protection. Water damage means you have to pay for the repairs — unless you have consumer-law protections where you live, or your government successfully takes action, something like Australia’s Competition and Consumer Commission (ACCC) did with Samsung related to Galaxy phones with false water-resistance claims. Samsung agreed to pay the penalty.
Tips for the future to keep your iPhone safe from water
- Even though your iPhone is water-resistant, treat it as if it isn’t and take all the precautions to keep it away from water.
- Take care while shooting pictures near pools, beaches, bathtubs, etc.
- If your lifestyle frequently involves using your iPhone near water, invest in a waterproof case. You may also research and buy insurance that covers liquid damage.
If you have something else to share that may benefit fellow readers, please put that in the comment section below.