


- If your iPhone Air won’t charge, make sure to check the USB-C port, cable, and power adapter.
- You can also try restarting your iPhone, updating the software, or restoring it.
- If your iPhone Air can’t charge to 100%, it’s because of the Optimized Battery Charging or Charge Limit feature.
One of the scariest — and most troubling — iPhone problems is when your phone will not charge. But don’t panic. There are some fairly mundane reasons why this might happen, and they’re generally easy to solve.
Why is my iPhone Air not charging?
If your iPhone Air doesn’t start charging when you plug it in, there could be a few reasons why. Common reasons include broken charging adapter, damage power cable, or damaged charging port. Another common reason for faulty charging is simply that your iPhone’s charging port is clogged with pocket fluff, and all that debris is preventing your cable from properly connecting.
What to do if iPhone Air Won’t Charge When Plugged In
Here are nine ways to diagnose and fix common iPhone Air charging problems.
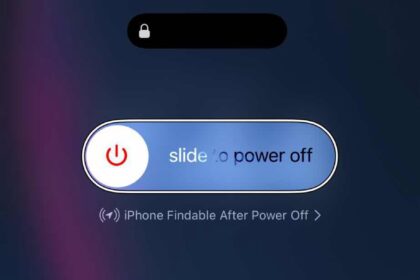
1. Turn it off and back on again
The first thing you should do if your iPhone Air is not charging is to restart the device. If your phone still has enough battery life, turn the phone off and back on, then try to charge it again.
Note: If your phone battery is very, very low — under 5% — or already completely dead, this step will not work for you.
2. Verify that your iPhone Air is not charging
If restarting the phone doesn’t help, check to make sure your iPhone Air is not charging. Connect your phone however you usually do to charge it — wirelessly, plugged into wall outlet, plugged into a computer’s USB port — and check the phone’s display. If the battery is already dead, leave it to charge for about two hours and then check on it.
You should see a lightning bolt in or beside the battery icon at the top right of the iPhone’s lock screen. If there is no lightning bolt in sight, it’s not charging.
3. Don’t charge it wirelessly
The iPhone Air supports wireless charging. If you are using a wireless charger to charge your iPhone Air, stop using it and plug the phone into a power source with a USB-C cable. Again, check to see if it’s charging. If it is, congratulations — you solved the problem. There’s some sort of problem with the phone’s wireless charging solution.
You might need to take your phone to an Apple store for service (or replace your wireless charging case) but in the meantime, you can keep the phone charged the old-fashioned way, with wires.
4. Check your iPhone’s USB-C port
If your iPhone Air still isn’t charging, your next stop should be to inspect the USB-C port. There are no covers on your phone’s charging port, meaning it’s exposed to every bit of dust, dirt and debris it encounters. Every time you slide your phone into your pocket, your phone will be susceptible to pocket fluff and if, like me, you’ve got pockets filled with detritus from accidentally washing your jeans with old receipts in the pockets, then that’s asking for trouble. And that’s to say nothing of the cookie crumbs. Do not ask me why I have cookie crumbs in my pockets.
Since your iPhone Air is still new, this won’t be a problem, but those tiny bits of dust and fluff will build up inside your charging port over time you have your phone, compacting each time you plug in your charging cable until it forms a solid barrier that stops your charger from going all the way in and allowing it to connect and charge.
It’s a simple task to unclog your phone’s port. You’ll need a cocktail stick, toothpick or other thin item that you can poke in to the port to scrape out the grime. Wood or plastic is better as it’s less likely to scrape against anything inside and potentially cause harm. I’ve done this using a metal SIM removal tool and the pin on the back of an earring and while it worked well, it’s not the safest option for your phone.
Insert your tool of choice into the charging port until it won’t go further and gently start scraping away. You should scrape around the charging connector, which sits in the middle of the port.
Eventually you’ll start to work the compacted debris loose and you’ll be able to encourage the dislodged material out of the port. It’s a satisfying process and you might be surprised at how much stuff actually comes out. Gently work on the sides of the port, too, but be careful not to scrape hard against any of the metal charging connectors.
Eventually you’ll have pretty much all of it out. It’s difficult to check for sure if you’ve gotten rid of it all as it’s tricky to see inside the port, even if you have a good light handy. But once you’ve got a good amount of debris out, you can try your charging cable again.
Hopefully it’ll plug in more securely now and begin charging. If not, keep trying to extract more dirt and then test the charger again. If that still doesn’t solve the issue, move on to the next troubleshooting step.
5. Inspect your cable
iPhone cables are prone to damage — the rubberized outer sheath breaks from repeated bending, and the wires become exposed. If your cable looks like that and it isn’t properly charging your iPhone Air, throw it away and get a new cable.
But USB-C cables get a lot of abuse, and problems aren’t always apparent to the naked eye. Sometimes wires can break while they’re still inside the sheath. And inexpensive third-party USB-C cables have been known to spontaneously stop working, often because the power regulator chip inside the cable has failed.
There’s no good way to see any of this visually, so the best way to test your USB-C cable is to simply try a different one — ideally, a fully-authorized cable from Apple that’s brand new.
6. Check where your phone is plugged in
On the long list of potential problems, you should also check your power source. If you’re charging your iPhone Air from a computer’s USB port, make sure the computer is fully awake (not in sleep or hibernation mode). Also try a different USB port, in case the USB port you were using has failed. Don’t try charging from a USB port built into a keyboard or USB hub — connect it directly to a USB port on the computer itself.
If it still doesn’t work, plug it directly into a wall power outlet with an AC adapter like the one that is sold by Apple. If you have been using an AC adapter this entire time, then try a different one — borrow one from a friend who has an iPhone or use the one that comes with a Mac.
You should also check for firm connections between your charging cable, USB wall adapter, and wall outlet or AC power cable, or try a different outlet.
7. Check for an iOS update
If you’re not running the latest version of iOS, it could be the reason why your iPhone Air is not charging. Software updates might not seem important when your phone is functioning properly, but they help prevent a host of problems and even improve performance.
Here’s how to check for an update on your iPhone Air and install it:
- Go to Settings and then tap General.
- Select Software Update. Your iPhone will now start searching for the latest iOS update.
- If an update is available, hit Update Now.
8. Try resetting and restoring your iPhone
When experiencing a problem with your iPhone, it sometimes helps to perform a factory reset.
A reset will return it to its factory default settings and, hopefully, get rid of any problem you might be facing. This is a last-ditch attempt to fix an an iPhone Air that’s not charging, and it’s worth a try.
9. Take your iPhone in for service
If your iPhone Air still won’t charge, it’s pretty likely that there’s something wrong with the phone itself. You should contact Apple or go to an Apple store for service.


