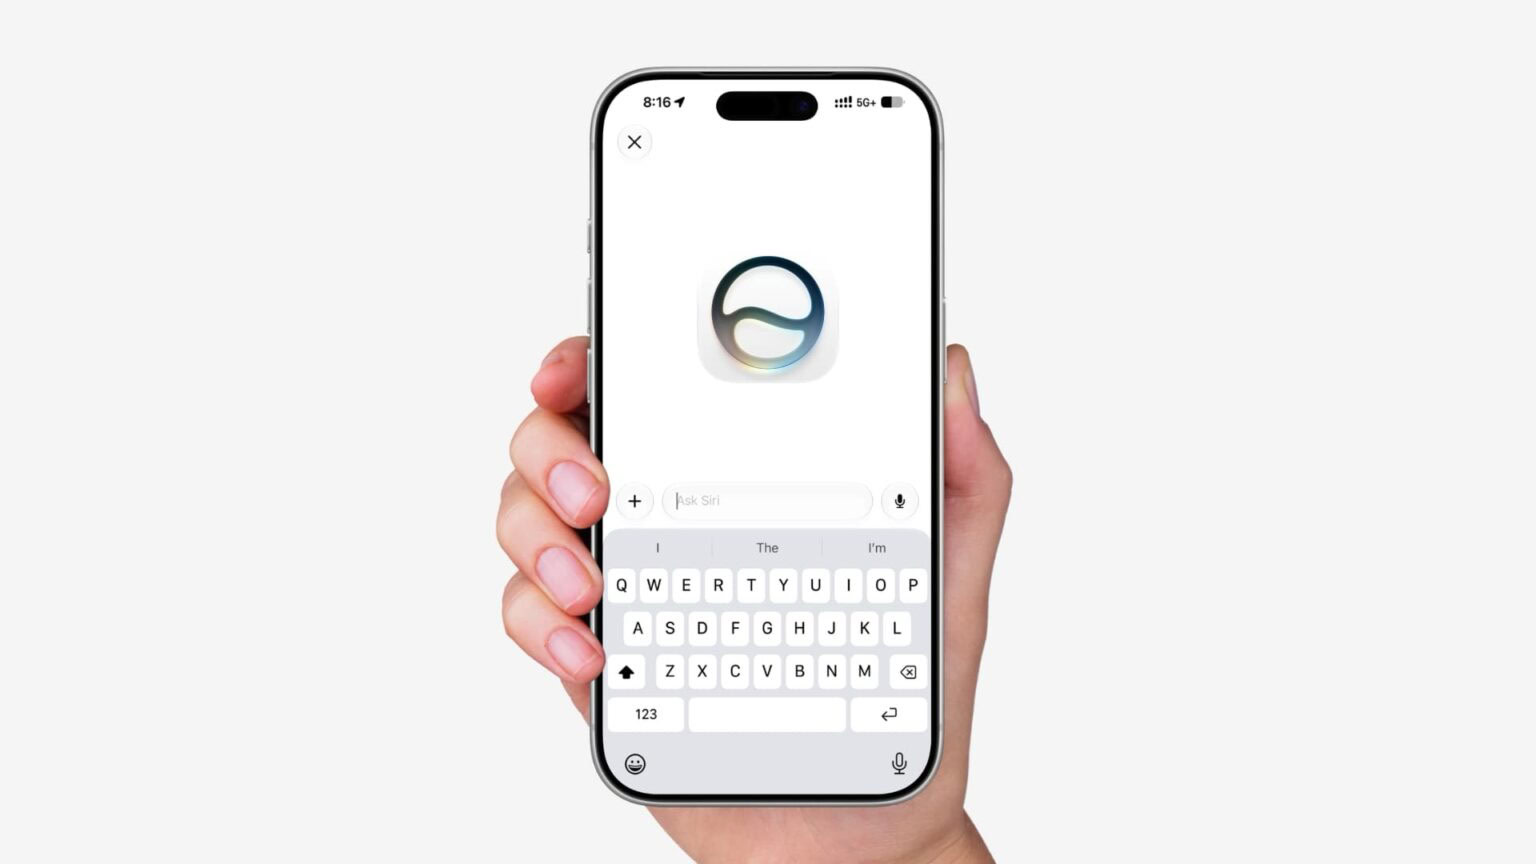
Siri AI is Apple’s generative artificial intelligence (AI) system, and it comes with a huge range of features and abilities. Providing your iPhone meets the Apple Intelligence requirements, you’ve got plenty of choice over how Siri sounds and behaves. You can also take advantage of the Siri AI features on a compatible Mac or iPad.
I’ve been using the new Siri AI with the iOS 27 beta for almost two months, both at home and in the car. I’ve also been turning to Siri in MacOS 27. And though there are rough edges, I’ve been impressed. The new Siri is certainly a dramatic improvement over the current version, not just with its skillset but with its greater accuracy and reliability.
Here, we’ll show you how to change Siri settings in iOS 27 on your iPhone, but many of the settings will work in a similar way on your iPad or Mac. We’ll run through the process for setting Siri up to hear your voice for the first time, changing the voice and accent it speaks in, and choosing how long your conversations are stored.
What You Need for Siri AI
Keep in mind that you need the right iPhone model to support Siri AI and Apple Intelligence. That means an iPhone 15 Pro or Pro Max, any iPhone 16 model, or any iPhone 17 model. The new Siri will also let you customize its voice and take advantage of more accurate dictation. But for those features, you’ll need an iPhone 17 Pro or Pro Max or an iPhone Air. Come September, I plan to upgrade to an iPhone 18 Pro, so I’ll be able to use all the new Siri features. For now, it’s only available via the iOS 27 public beta, but betas can be unstable, so you may want to avoid installing it on your primary phone. In my case, I’m running it on two spare devices, an iPhone 16 Pro and an iPhone 17 Pro. The final, stable version is expected in September.
How to Change Siri Settings in iOS 27
With those requirements out of the way, here’s how to change Siri settings on iPhone.
1. Set Up Siri for Voice
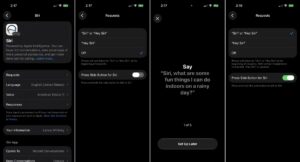
First, make sure Siri is set up to listen to your voice requests. Go to Settings > Siri and select Requests. Change the option to “Siri” or “Hey Siri,” whichever you prefer. You can then activate Siri using your chosen wake phrase. I prefer to just say “Siri.” You can also set up manual access to Siri. Turn on Press Side Button for Siri, and you’ll be able to press the side button on your phone to invoke Siri. If you’re switching from Off to one of the other two options, you’ll be prompted to train Siri on the sound of your voice by speaking five different commands.
2. Change Siri’s Voice or Accent
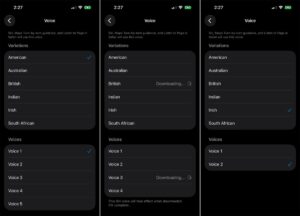
Don’t like Siri’s current voice? You can easily change it. Go to Settings > Siri and select Voice. In the Voices section, tap each voice to hear how it sounds. Tap the one you like best and then wait for it to fully download. To add some spice to the voice, you can select one of the accents in the Variations field. However, not all voices will be available with all accents, so you may need to change the voice as well.
3. Customize How Siri Responds
Next, you’re able to decide how Siri responds to your voice. At the Siri Settings screen, select Responses and choose Speak Back for Voice Input to make sure that Siri responds to you by voice. If you plan to ask Siri to send text messages and don’t need to confirm each request, turn on Automatically Send Messages to speed up the process. You can also turn this option on when you’re connected to headphones or Apple CarPlay.
4. Choose How Long Your Siri Conversations Are Stored
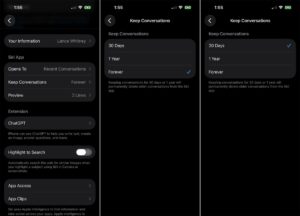
The new Siri app stores every conversation and request you make with Siri AI, whether you type or speak them. Though Apple promises that your chats are associated with a random identifier rather than your user ID, you may still not want your conversations stored indefinitely. To control this, open Settings on your iPhone, tap Siri and select Keep Conversations. From here you can change the setting from Forever to either 30 Days or 1 Year.
Once selected, iOS 27 will automatically purge any Siri conversations older than your chosen timeframe.
5. Tweak Your Conversation View
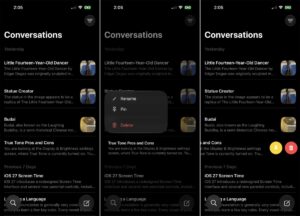
You can customize how your past conversations appear in the Siri app. At the Siri App section on the Siri settings screen, tap Opens to. Here, you can set what you want to see each time you open the app—Recent Conversations or a New Conversation. If you mostly talk to Siri by voice without launching the app, you’ll probably want to see your recent conversations. If you use the app to speak or type to Siri, you may prefer to see the New Conversation window instead.
Go back to the previous screen and select Preview. Here, you set how many lines of each conversation you’d see at the Recent Conversations screen. To see fewer lines and more conversations, keep the number to none, 1, or 2. To see more lines and fewer conversations, set it to 3, 4, or 5.
6. Turn on Accessibility Options
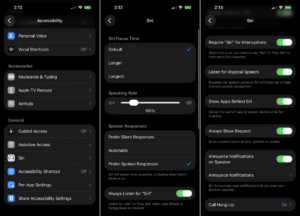
If you’re looking to further customize how Siri AI responds to your requests, head over to Settings > Accessibility > Siri to tweak a few accessibility options:
- Siri Pause Time lets you set how long Siri should wait for you to stop speaking—Default, Longer, or Longest.
- Speaking Rate allows you to adjust a slider to determine how fast or slow Siri speaks.
- Spoken Responses will let you choose how you want Siri to respond.
- Always Listen for “Hey Siri” will make sure Siri is listening even if your phone is face down or covered.
- Require “Siri” for Interruptions sets whether you need to say the word “Siri” to interrupt the AI when it’s speaking.
- Listen for Atypical Speech allows Siri to respond even if your speech patterns are unusual.
- Show Apps Behind Siri keeps your current app visible even when you call on Siri.
- Always Show Request lets you see a transcription of your speech on the screen.
- Announce Notifications on Speaker tells Siri to announce notifications over the speaker on your iPhone or iPad.
- Turning on Call Hang Up allows you to say “Siri, hang up” to end a phone or FaceTime call.