


You’re trying to read the fine print on an important document, but you’re having a little bit of difficulty. Apple’s Magnifier tool allows you get an up close look at things you’re having trouble seeing. In this article, I’ll answer the question, “What is Magnifier on an iPad?”, as well as show you how to turn Magnifier on and how to use it!
What Is Magnifier On An iPad?
Magnifier is an Accessibility tool that turns your iPad into a magnifying glass. Magnifier is especially useful for the visually impaired, who may have a hard time reading small text in a book or pamphlet.
You can open the Magnifier app from your Home Screen, set it up in the Settings app as an Accessibility Shortcut, or add it to Control Center.
How To Turn On Magnifier In The Settings App On iPad
- Open the Settings app.
- Tap Accessibility.
- Scroll down and tap Accessibility Shortcut.
- Tap Magnifier to select it.
- Triple-click the Home button (on iPads with a Home button) or the top button (on other iPad models) to open Magnifier.
How To Add Magnifier To Control Center On An iPad
- Swipe down from the top-right corner of the screen to open Control Center.
- Tap the + button in the top-left corner.
- Tap Add a Control.
- Scroll down and tap Magnifier to add it to Control Center.
How To Use Magnifier On An iPad
Now that you’ve turned on Magnifier in the Settings app or added it to Control Center, it’s time to get magnifying. Triple-click the Home button or top button if you set up Magnifier as an Accessibility Shortcut, open the Magnifier app from your Home Screen, or tap the Magnifier icon in Control Center if you’ve added it there.
When you do, you’ll be taken to the Magnifier, which looks similar to the Camera app. You’ll see several main things:
- A preview of area your iPad is zooming in on.
- A slider that lets you zoom in or out.
- A Flashlight icon that toggles your iPad’s back light on and off (on iPad models with a rear camera flash).
- Three overlapping circles in the bottom right-hand corner of the screen, which opens color filter options.
- A half-filled circle icon that allows you to control contrast.
- A circular button, which you can press to take a “picture” of the area that you’re magnifying.
Note: By default, this image is not saved to the Photos app on your iPad.
How To Save A Picture Taken Using Magnifier
- Press the circular button in Magnifier to take a picture of the area.
- Tap the Share icon in the top right corner of the screen.
- A Sharing menu should appear allowing you to send the image to contacts, upload it to social media or save the image to your Photos app.
- Tap Save Image to save the picture to the Photos app on your iPad.
Note: The image won’t be saved as it appears in Magnifier. You’ll have to zoom in on the image in the Photos app.
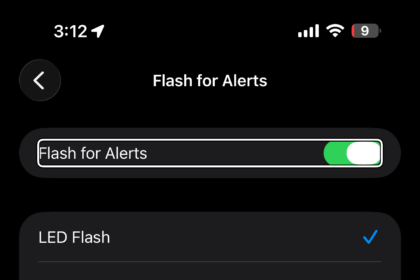
How To Turn On Flash Light In Magnifier On An iPad
Magnifier also comes with a built-in flashlight to illuminate the area you want to get a closer look at. To use this feature, open Magnifier in Control Center or by triple-pressing the Home button or top button.
Then, tap the flashlight button in the lower right-hand corner of the screen. Once you turn the flashlight on, the light on the back of your iPad should turn on.
How To Focus In Magnifier On An iPad
You can also focus on a specific area in Magnifier, just like you can in the Camera app. To do this, tap the area of the screen you want Magnifier to focus on.
A small, yellow square will briefly appear in the area you tapped, then the preview should focus where you tapped it.
How To Adjust Color And Brightness Settings In Magnifier On Your iPad
Adjusting the color and brightness in Magnifier can make the images you take look really, really cool. There are a number of different settings and features, and we’ll briefly describe each one of them.
To access the color filter options, tap the three overlapping circles in the lower right-hand corner of the screen. You’ll know a filter is active when the circles turn yellow.
Explaining The Magnifier Brightness And Color Settings
There are a two sliders and a number of color filters you can use in Magnifier. We recommend playing around with these features yourself because, in our opinion, a picture is worth a thousands words! Here’s a quick sentence or two about each of the settings:
- Tap the sun icon to adjust the brightness. The further you drag the slider to the right, the brighter the Magnifier image becomes.
- Tap the half-filled circle to adjust the contrast.
- Tap the three overlapping circles, then swipe across the different color filters to view their effects.
Magnifier On An iPad: Explained!
You’re officially a Magnifier expert and you won’t struggle trying to read tiny text ever again. Now that you know what Magnifier is and how to use it on an iPad, make sure to share this article on social media with your friends and family! Thanks for reading, and feel free to leave us a comment down below.


