


Photos, videos, and apps take up an iPad’s storage space quickly. Thankfully, there are several ways to free up space on your iPad.
How to free up storage space on your iPad
First, see what’s taking up the most space on your iPad
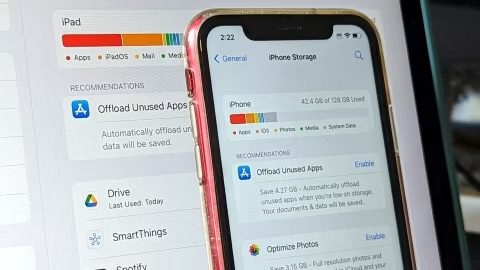
If you’ve received the dreaded “storage almost full” warning on your iPad, start by checking what’s eating up your storage so that you know where to get started. Go to Settings > General > iPad Storage. You’ll see a list of your apps, and the amount of space that each one uses. You might see recommendations for optimizing your storage.
Delete apps you no longer use
Once you know how much storage you have and what’s taking up the most space, you can start clearing out your iPad. One way to do this is to get rid of apps you no longer use. If you don’t know where to start, take a look at which apps you haven’t used in a long time. Open your iPad’s Settings menu, tap **General **and go to iPad Storage. You’ll see a list of your apps along with how much space each app occupies and the last time you used it. Scroll through the list and look for apps you don’t use. Tap them and select Delete App. Any purchased app is always available to re-download again at no extra charge from the App Store.
Offload apps you don’t use all the time
If you don’t want to completely delete an app, you can offload it instead. Offloading it lets you retain the documents and data associated with that app so that you can reinstall it anytime and quickly pick up right where you left off. Head back to the list mentioned above by opening Settings, pressing General and choosing iPad Storage. Tap any app in the list and hit Offload App. Wait a little bit and the app should then be removed offline, while your documents and data will stay saved on your device.
To clear space on iPad for update, just go through the list and offload every app you can. The amount that’s offloaded for each app will vary, but you should see the number next to App Size. Discard the number next to Documents & Data, because that will stay on your device. The only way to get rid of that is to actually delete the app.
Offload as many apps as you need until you have enough storage. You can’t use an app that’s offloaded, but if you want to get an app back, go to your App Library and tap on the iCloud button to re-download it. If the offloaded app is on your home screen, simply tap on it to download it. You won’t have to re-sign in or anything; you’ll have access to the app as if it was never deleted.
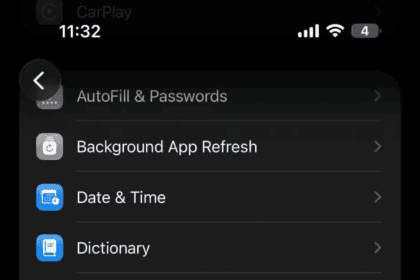
If you don’t want to remove apps manually, you can have iPad automatically remove unused apps. Go to Settings > Apps > App Store > Offload Unused Apps and toggle it on.
The unused apps move to iCloud Drive. You can find them in iCloud Drive in the Files app.
Move Photos and Videos to Cloud Storage
The Photos app often takes up a lot more space than people realize, so let’s deal with that app directly. Under Settings > General > iPad Storage, find Photos to see how much storage it’s using. If you have more than 1GB here, you should consider copying photos and videos to a cloud storage service so you can delete them from your iPad.
If you have a Google account, an easy option here is Google Photos. Download the app, sign in, and tap your account icon on the top right. Select Google Photos Settings > Back Up and toggle it to on. Make sure Google Photos has access to Photos (Settings > Apps > Google Photos > Photos > Full Access) and then, every photo you take with your iPad will be automatically backed up to Google Photos when you’re online and accessible across your devices and on the web.
Google used to offer unlimited photo storage via Google Photos, but that deal no longer exist, so plan accordingly as photo and video uploads count against your Google account storage. If you’re a Prime member, Amazon Photos still offers unlimited uploads.
Once iPad photos have been uploaded to your cloud service of choice, double- and triple-check that they’re there and then delete them from the Photos app. Google Photos will even delete them for you as they get uploaded, if you trust that option. Then go to the Photos app on your iPad. Tap Utilities in the sidebar, then tap Recently Deleted. Tap Select, then choose the photos and videos you want to delete.
Tap the More button at the bottom of the screen, then tap Delete. If you skip that last step, you won’t free up any space for a month, as deleted photos and videos are kept in Recently Deleted for 30 days, just in case you change your mind.
You can also choose to keep lower-resolution photos on your iPad while allowing the full-resolution ones to remain in iCloud. Go to Settings > Apps > Photos > Optimize iPad Storage and make sure it has a checkmark next to it. (iCloud Photos needs to be enabled.)
Delete videos and music from apps
You probably have videos and music stored offline in multiple apps on your iPad, and fortunately, there’s an easy way to find those files and delete them. Launch Settings, choose General and select iPad Storage. Search for an app that you’ve downloaded offline content from, such as Netflix. You’ll then see storage information about the app, such as its size and buttons for deleting or offloading it.
If you’ve downloaded offline videos, you’ll also see a section for this content underneath the Delete App button. Place your finger on a downloaded video and swipe it all the way over to the left side of the screen to delete it. You can also swipe left on the video you want to remove, then tap Delete.
Clear out your web browser cache
You can always free up cache space on your iPad if you’re really scrounging for space, although deleting apps and media will make a much bigger difference. But doing so could give your iPad a bit of a speed boost when web browsing, so it’s worth trying if you’re low on storage and are experiencing sluggish browser performance. But just remember that it will sign you out of websites you’ve logged into.
Open Settings, tap Apps, choose Safari and tap Clear History and Website Data.
Delete unnecessary files
If you have documents and data on your iPad that you no longer need, you can find and delete them in the Files app.
- Go to the Files app on your iPad.
- Locate the file you want to delete.
- Touch and hold the file, then tap Delete.
Automatically delete old messages
One of the things that can eat up storage space over time is iMessages. By default, your iPad saves every iMessage you receive. You can manually delete old iMessages to clear up space, but that’s a pain. Instead, you should use the automatic method. You can set your iPad to automatically delete your message history by opening Settings, choosing Apps > selecting Messagesand tapping the Keep Messages option under Message History. From there, select if you’d like your iPad to retain text messages for 30 days, one year or forever.
Conclusion
There are a lot of ways to clear up some extra storage space on your iPad when you need it. Hopefully, with these tips in mind, you can get the most out of yours. If you ever find you’re constantly running into storage issues, you might want to get an iPad with more space.


