


If you forgot your passcode and are unable to unlock your iPhone, you can reset your iPhone to remove the passcode lock and then restore it from a backup later. We’ll show you how to reset a locked iPhone wirelessly if you’re using iOS 17. We’ll also show you how to reset a locked iPhone wirelessly if you’re using an earlier version of iOS, and how to reset it using a computer.
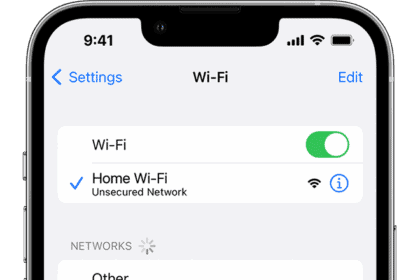
To restore your device, you’ll need to have a backup already stored in iCloud or on your computer. Before you reset your device wirelessly, you’ll need to know your Apple ID and password, and your iPhone must be connected to the internet using Wi-Fi or cellular data.
How to reset a locked iPhone wirelessly using iOS 17
If you’ve entered your passcode incorrectly too many times, your device will be disabled, and there will be an option to reset your iPhone in the bottom right corner of the screen. To do this, tap Forgot Passcode, then tap Start iPhone Reset.
All content and settings on your iPhone, including the passcode, will be erased. If you have a backup saved in iCloud or on your computer, you can restore your content when the process finishes.
To proceed, enter your Apple ID password when prompted.
If your iPhone has an eSIM, you’ll be asked if you’d like to keep your eSIM or delete it. Both options will erase all content on your iPhone. However, if you delete your eSIM, you’ll need to contact your carrier to set up a new one.
Now, the process of resetting your iPhone will begin, which might take a moment.
Once it’s been erased, the hello screen will appear. You can then follow the prompts to restore your iPhone from a backup if you have one.
How to reset a locked iPhone wirelessly using iOS 16 or earlier
If you’ve entered your passcode incorrectly too many times, your device will be disabled, and there will be an option to erase your iPhone in the bottom right corner of the screen. To do this, tap Erase iPhone. This will erase all content and settings on your iPhone, including the passcode. If you have a backup saved in iCloud or on your computer, you can restore your content when the process is complete.
If your iPhone has an eSIM, your eSIM will be deleted, and you’ll need to contact your carrier to set up a new one.
To continue, tap Erase iPhone again and then enter your Apple ID password when prompted.
Now, the process of erasing your iPhone will begin. This might take a little while.
Once it’s been erased, the hello screen will appear. You can then follow the prompts to restore your iPhone from a backup if you have one.
How to reset a locked iPhone using Recovery Mode
If you can’t reset your locked iPhone wirelessly, you can reset it with Recovery Mode and a computer. To use this option, you’ll need a Mac or Windows computer and a compatible cable. Your iPhone will need to be powered on and plugged into your computer. If your iPhone has Find My enabled, you’ll need to make sure you have your Apple ID and password ready.
First, you’ll perform a few steps on your iPhone to enter Recovery Mode. The steps will vary depending on what model of iPhone you have. Once you’ve entered recovery mode, you’ll use your computer to reset it.
- If you have an iPhone X or later, a second-generation iPhone SE or later, an iPhone 8, or an iPhone 8 Plus, press and hold the Side button and one of the volume buttons until the power off slider appears. Drag the slider to turn off your device. Now, press and hold the Side button and immediately connect your device to your computer while holding the button. Make sure to keep holding the Side button until the Recovery Mode screen appears. This might take a moment.
-
If you have an iPhone 7 or an iPhone 7 Plus, press and hold the Side button until the power off slider appears, then drag the slider to turn off your device. Now, press and hold the volume down button and immediately connect your device to your computer while holding the button. Make sure to keep holding the volume down button until the Recovery Mode screen appears. This might take a moment.
-
If you have a first-generation iPhone SE or an iPhone 6S or earlier, press and hold the Side or Top button until the power off slider appears. Next, drag the slider to turn off your device, then press and hold the Home button and immediately connect your device to your computer while holding the button. Make sure to keep holding the Home button until the Recovery Mode screen appears. This might take a moment.
Now, you’ll complete the process using your computer.
If you have a Mac using macOS Catalina or later, open the Finder. If you’re using macOS Mojave or earlier, open iTunes. If you’re using a Windows computer, open iTunes or Apple Devices.
You might be prompted to confirm that you want to connect your iPhone to your Mac. Click Allow to continue.
When the option to Restore or Update your device appears, click Restore. This will erase all settings and content, including the passcode. If you have a backup saved to your computer or iCloud, you can restore it after this process is done.
Click Restore and Update when you’re ready, and follow the prompts.
Your computer will download and install the latest available version of iOS on your iPhone. During this process, you might be asked to review and accept the terms and conditions. Click Agree to continue.
If the download takes longer than 15 minutes, your device will exit Recovery Mode. To re-enter Recovery Mode, you’ll need to repeat the button presses on your iPhone described in the previous section of this guide. Be sure not to disconnect your device while it’s restoring.
When the process is finished, your iPhone will restart, and the hello screen will appear. You can then follow the prompts to restore your iPhone from a backup if you have one.
If you still need help, contact Apple Support to speak with an adviser or make an appointment at an Apple store or Apple authorized service provider.
To learn more about your Apple devices, tap or click another article below to keep reading.


